Do you want to ensure your lesson resources are shared with users only after the lesson is completed? With Thrive Apprentice and Thrive Architect you can use the conditional display feature to ensure the resources are shown only after the lesson has been completed.
In this article, we’ll show you the best way to add lesson resources to a lesson template and apply conditional display to it.
- Accessing and Editing the Lesson Template
- Adding the Content Box Element to the Lesson Template
- Adding the Lesson Resources inside the Content Box Element
- Setting Up Conditional Display Options and Rules
Accessing and Editing the Lesson Template
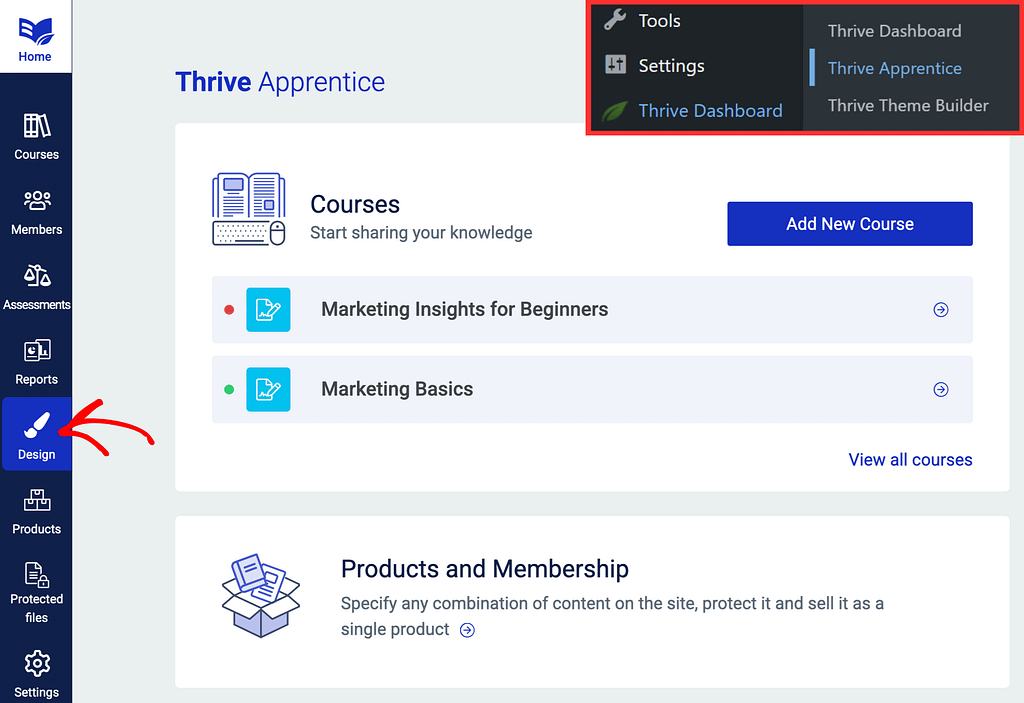
To begin, you’ll first need to open a lesson template in Thrive Apprentice and edit it. To do so, open your WordPress admin area, navigate to Thrive Dashboard >> Thrive Apprentice, and click on Design in the left column.
On the Design page, click Edit design to edit the active design.
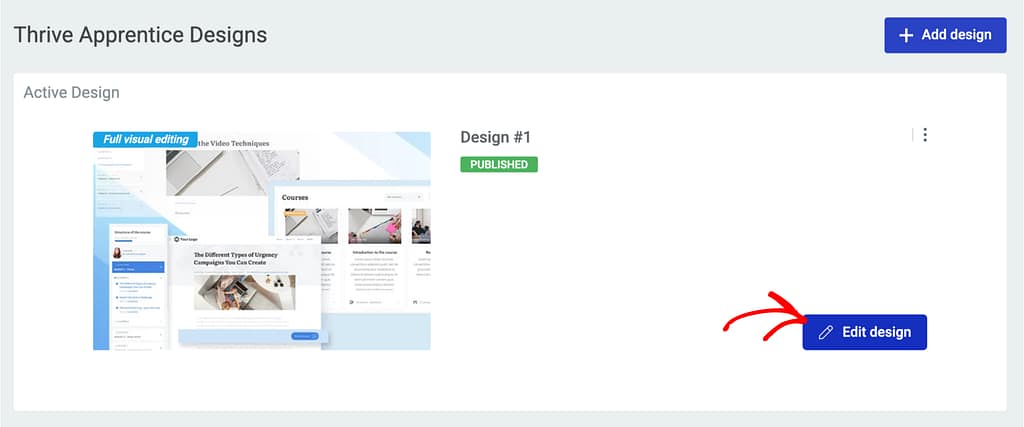
On the Thrive Apprentice design page, click the Manage templates button inside the Template editor block.
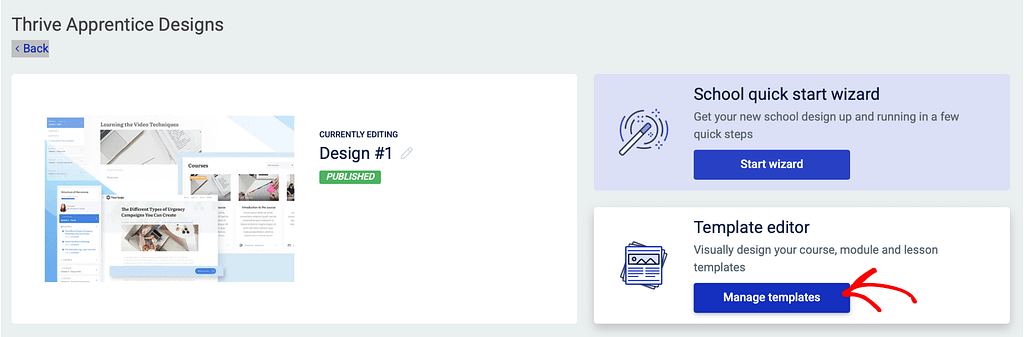
When you click Manage templates, you’ll be taken to the Thrive Apprentice templates page. On the templates page, you’ll see a number of default templates that you can use or choose to create a new one.
In this example we’ll be using the Default Lesson Template. If you want to add and use your own lesson template, refer to this document.
To open a lesson template in the editor, hover on the template and click Edit.
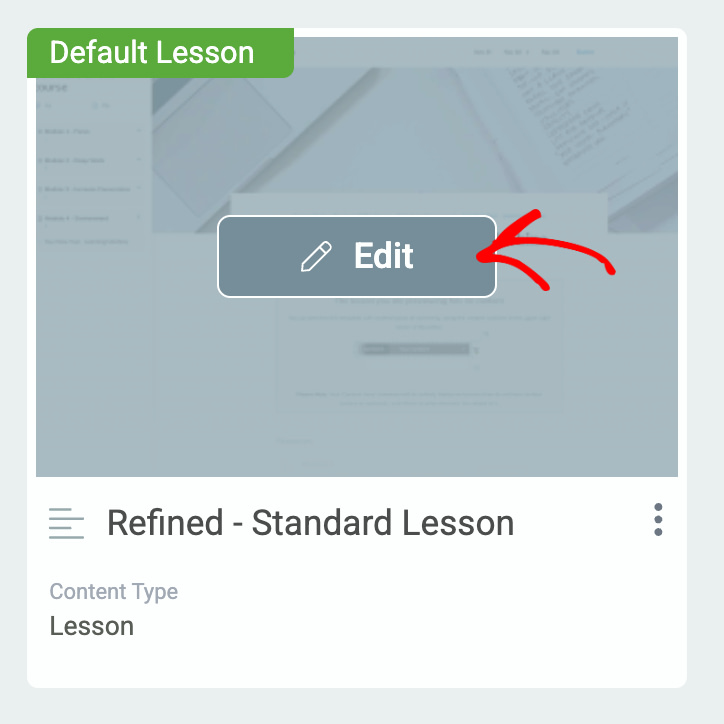
Clicking edit will open the lesson template in the editor where you can edit the layouts, positioning or present elements, choose to add new elements, etc.
Adding the Content Box Element to the Lesson Template
After you’ve opened the lesson template in the editor, you’ll need to add the Content Box element that can contain the Lesson resources you want to add.
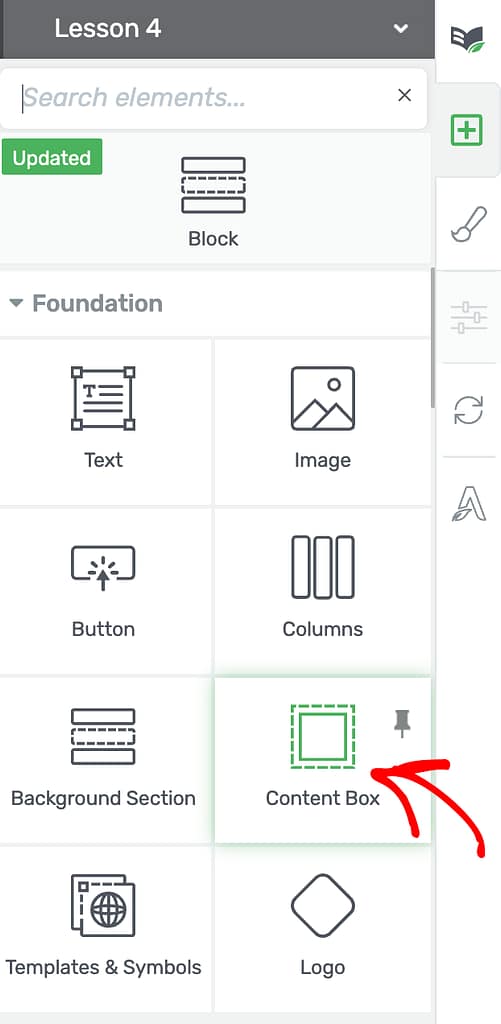
To add a Content Box in the template, start by clicking the plus icon in the right column.
When you click the plus icon, select the Content Box element and drag and drop it on the template.
Adding the Lesson Resources Inside the Content Box Element
When you add the Content Box to the template, click on the plus icon in the right panel again.
This time, select and drag and drop the Lesson Resources element inside the Content Box element on the template.

After you drag and drop the Lesson Resources in the Content Box, you’ll see it that way in the template.

You can refer to this section in a document to know how you can add resources to a lesson. Furthermore, we’d recommend you to read our document to understand the Lesson resources element in depth.
Setting Up Conditional Display Options and Rules
As mentioned earlier, we want the lesson resources to be shown only after a student completes the lesson. This can be handled using conditional display options.
So, the next step here is to apply Conditional display options and rules to the Content Box that contains the Lesson Resources.
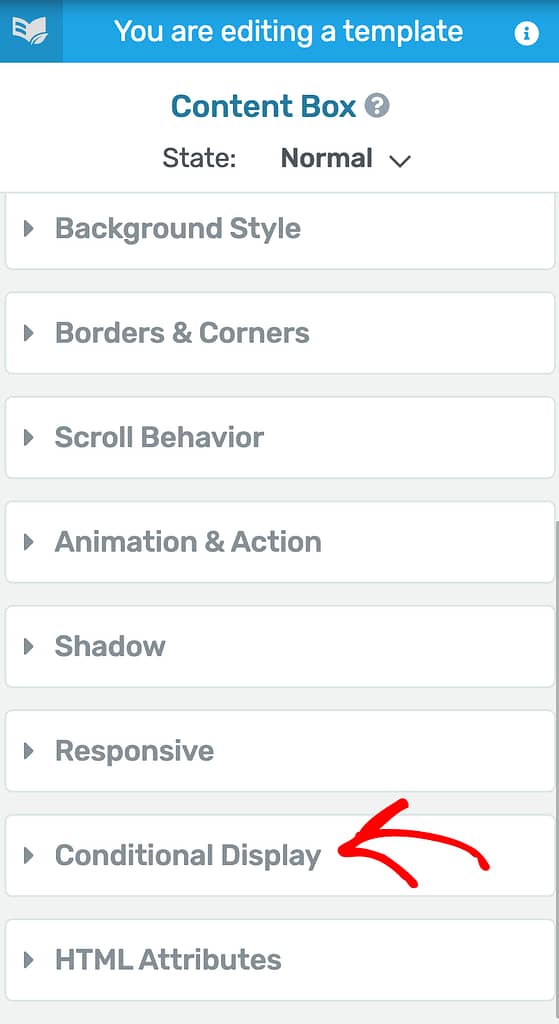
To access the Conditional display settings of a Content box element, click on the element in the template. This will open the options and settings in the left panel.

In the left panel, scroll down and click on Conditional Display.
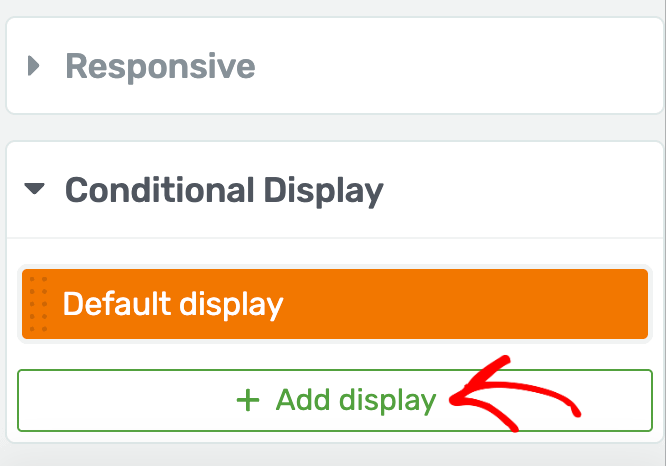
After extending the Conditional Display, click Add display to add a display condition here.
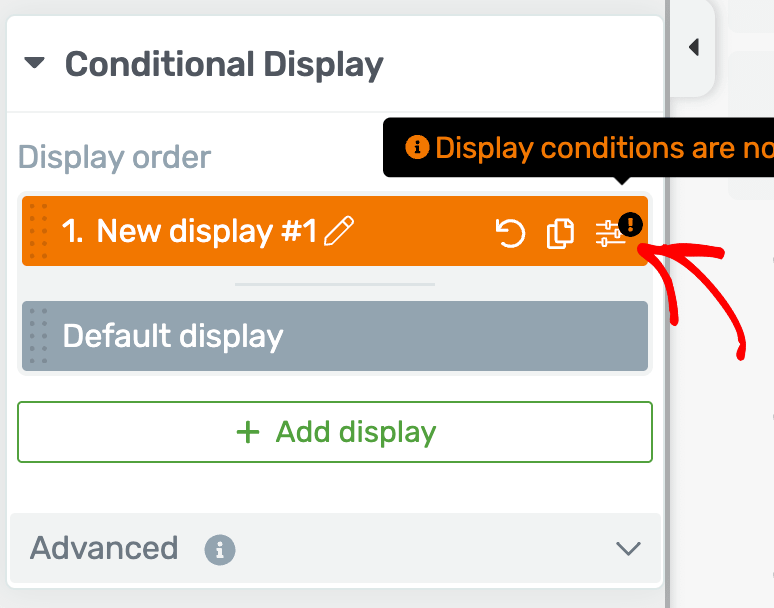
After adding a display, click the filter icon beside the newly added display to add conditions to it.
Clicking the filter icon will open a popup where you select Display content in the dropdown and click on New condition set.

Next, you’ll be able to set the condition in the fields that appear.
The condition here would be – When an Apprentice Lesson – Lesson status – is – Complete.
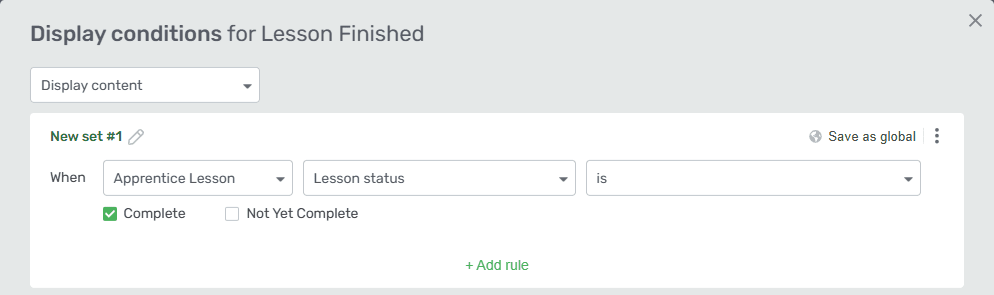
After you select the above display condition, click Save on the popup.
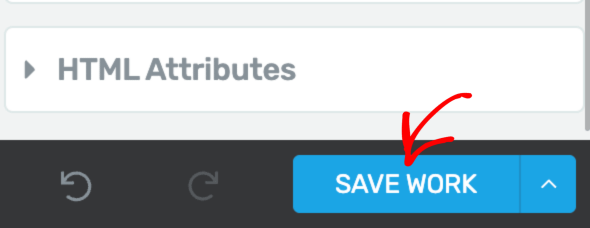
Finally after you finish adding the conditional display settings for the lesson resources alongside the template design and settings, save the template by clicking the Save Work button in the bottom left of the screen.
We’ve just seen how you can set your lesson resources to display only when a Thrive Apprentice lesson is marked complete.
Next, there are multiple things you can experiment using conditional display. Read our document here to learn more.