Do you want to sell your Thrive Apprentice products using WooCommerce? You can do this by connecting products in Thrive Apprentice with those in WooCommerce.
In this article, we’ll show you how to create products in Thrive Apprentice and start selling them using WooCommerce in a few easy steps.
- Create a Product in Thrive Apprentice
- Create a Product in WooCommerce
- Redirecting Users to the Thrive Apprentice Product Page
- Configure Product Access Restrictions in Thrive Apprentice
Note: Before getting started, here are a few requirements you need to make note of:
- The WooCommerce plugin has to be installed and activated
- The Thrive Apprentice plugin has to be installed and activated
- At least one payment method (PayPal or Stripe) has to be set up
Create a Product in Thrive Apprentice
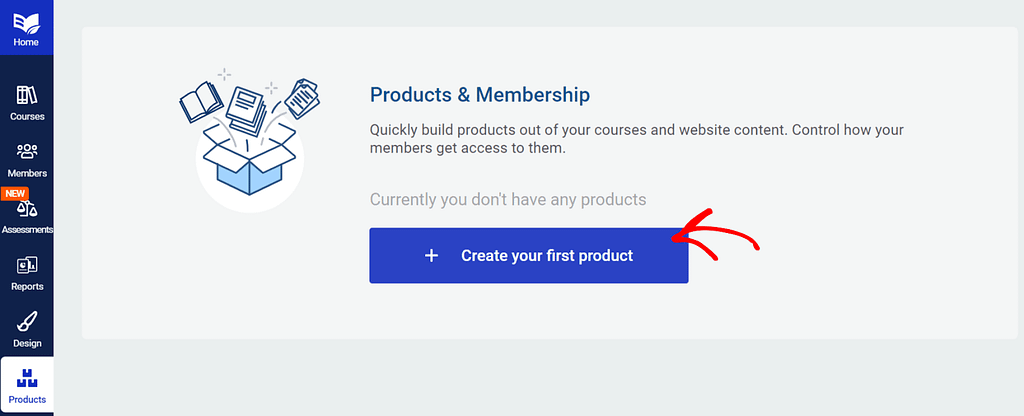
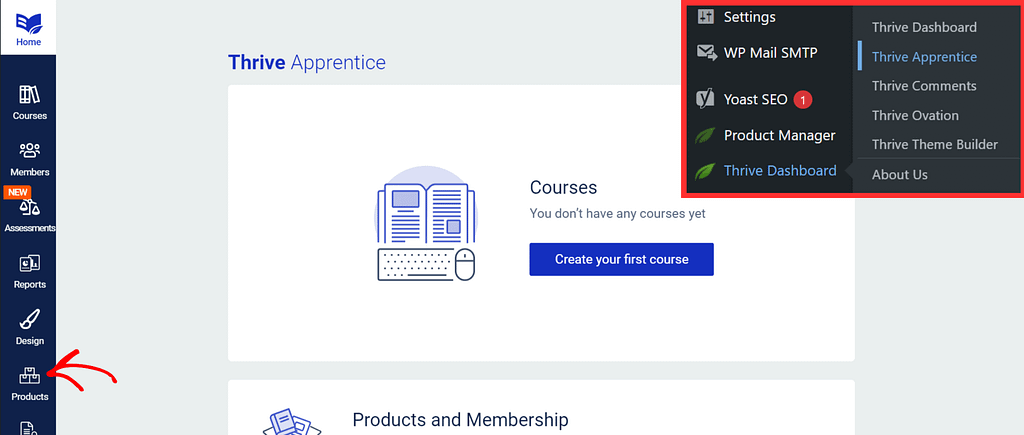
To begin with, create a product in Thrive Apprentice. Navigate to your WordPress admin area, Thrive Dashboard >> Thrive Apprentice, and open the Product tab to create one.

On the Products page, click the “Create your first product” button.
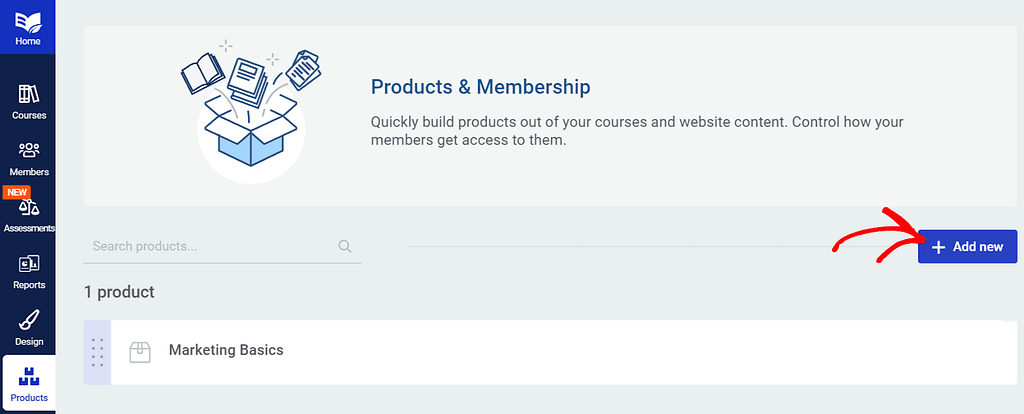
If you have a few products added already, click the Add New button to add a new product.
When you click any of the above buttons to create a new product, you’ll see a popup where you can name the product. This is where you can name your product.
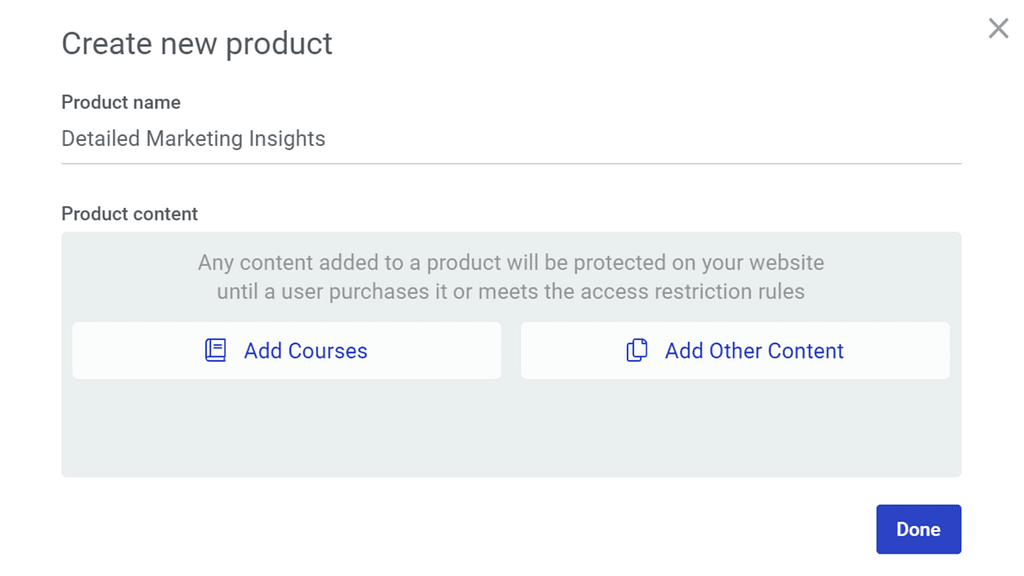
On the same popup, you can create a course within the product by clicking the Add Course button.
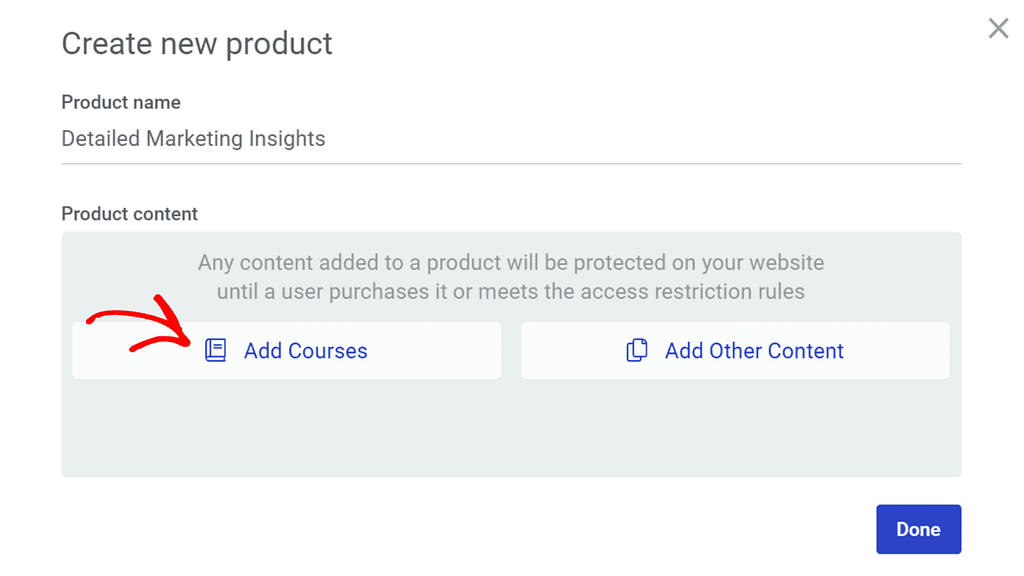
If you’ve created a course and would like to consider it into the product, you can select it here.
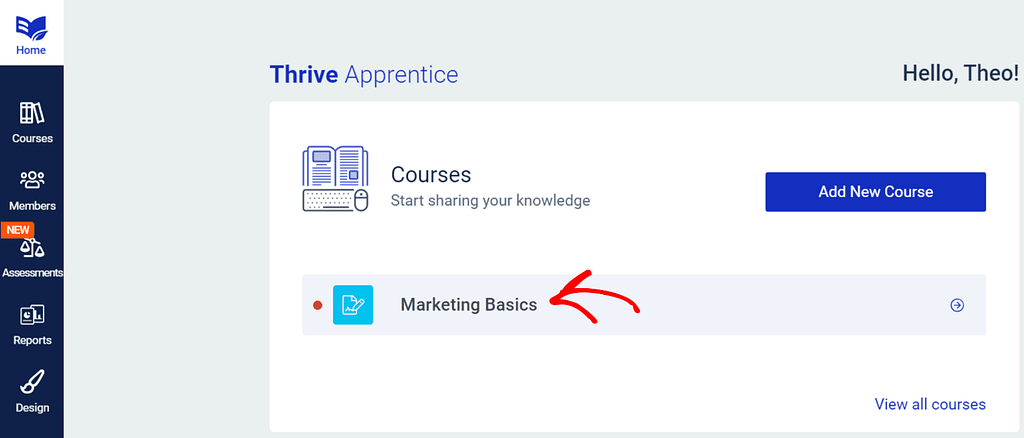
Another method of creating a Thrive Apprentice product is to access an already-created course on the Apprentice Course page or the Thrive Apprentice dashboard. In the Thrive Apprentice dashboard, you’ll see the already-created course, which you can click on to open, and an Add New Course button to create a new course.

On the Course page, click on the course to which you’d like to add a product or click the Add New Course button to create a new course.
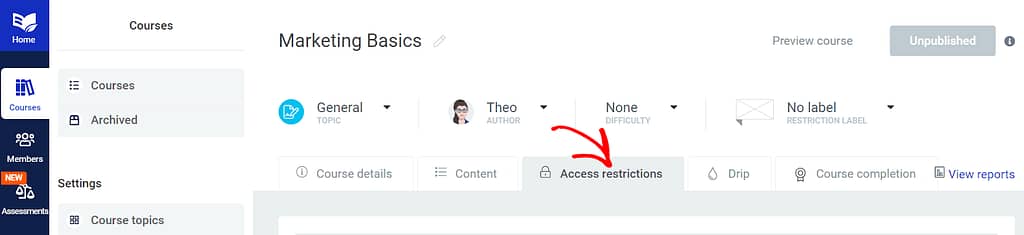
When you click on the course, you’ll be taken to a page where you’ll see the Course details. On this page, click the Access Restrictions tab.
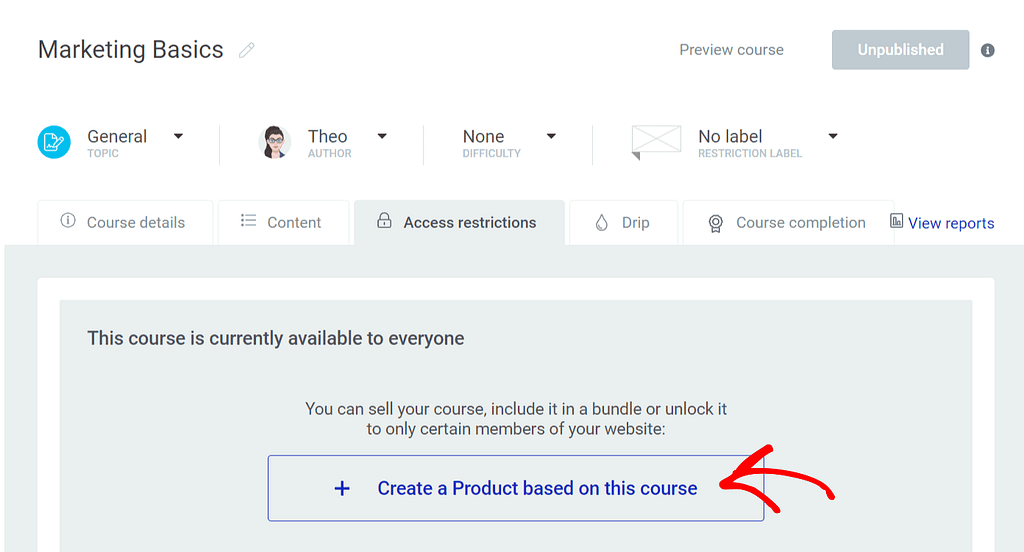
Under the Access Restrictions tab, click the “Create a Product based on this course” button.
After clicking the button, you’ll see a popup where you can add the product name and any additional courses or content to be displayed under this product.
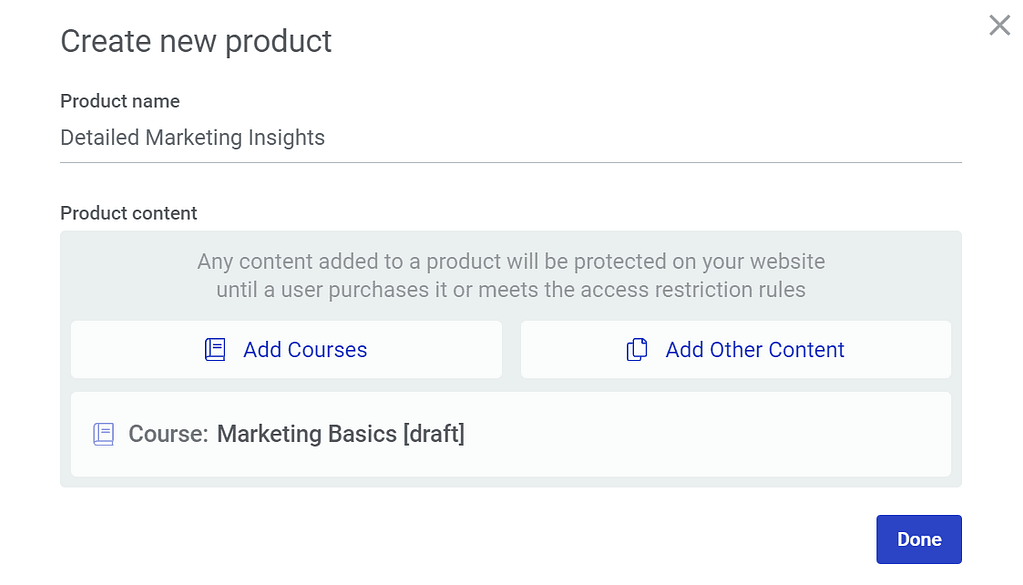
After adding the product details, click the Done button.
Note: A course is marked as Draft until you finish editing it and click Publish. To learn more about managing course status, please read our document here.
A product in Thrive Apprentice is a digital layer that allows you to protect your course content and non-course content.
Everything you need to know about creating a Thrive Apprentice product and getting around in the “Products” section is detailed in this article: How to Use the Products Section of Thrive Apprentice.
After you create your product, you can work on its access restriction rules. These rules define what to display to users who try to access the product without the necessary permissions.
- Access Restriction Rules at the Product Level
- Thrive Apprentice – Login & Access Restriction Settings
- Using Dynamic Access Restriction Labels
- Using Dynamic Call to Action Buttons
It is important to create a setup so that when someone tries to access the course (regardless of whether they are logged in), they are redirected to a page with a link to the product page, from which they can purchase the product.
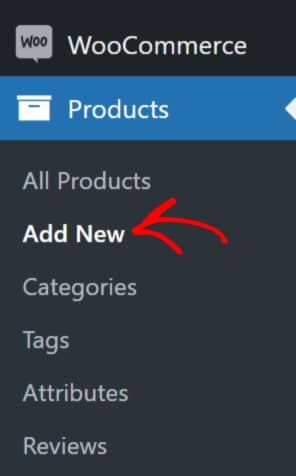
Create a Product in WooCommerce
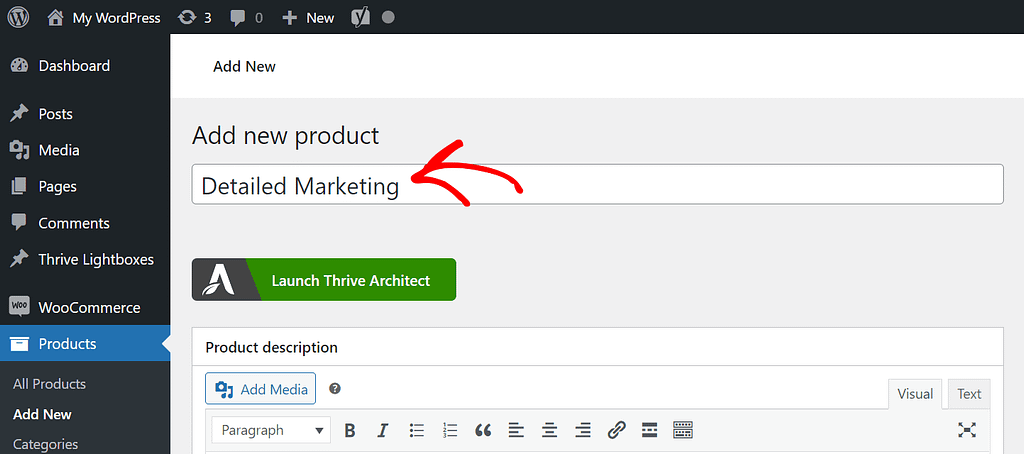
To create a new WooCommerce product, open your WordPress admin area and navigate to Products >> Add New.
After clicking the Create Product button, you’ll be taken to the New Product page, where you must add the Product name.
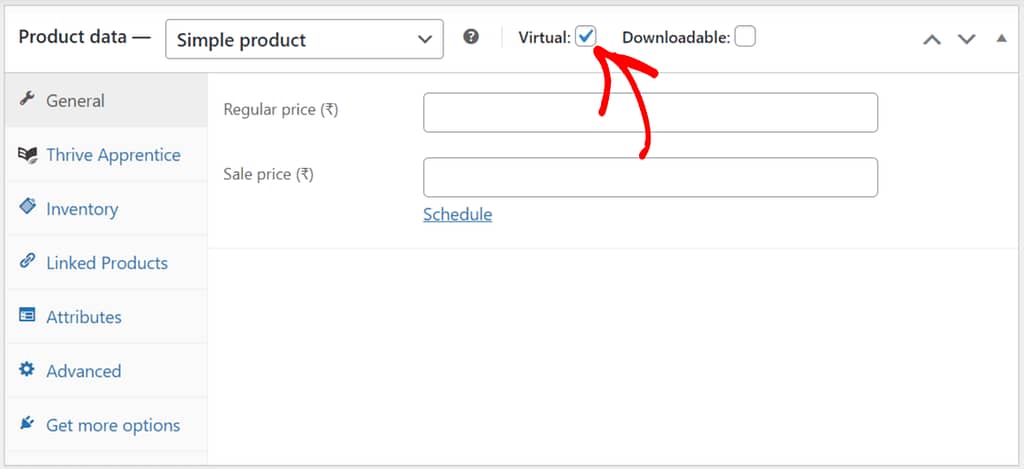
When you add the Product name, scroll down to the section where you can add the product data and customize it.

Furthermore, you can select whether your product is virtual or a downloadable open. Since you are offering a set of Thrive Apprentice courses, it is recommended that you select Virtual.
Once you select the product type, click the Thrive Apprentice option in the left column.
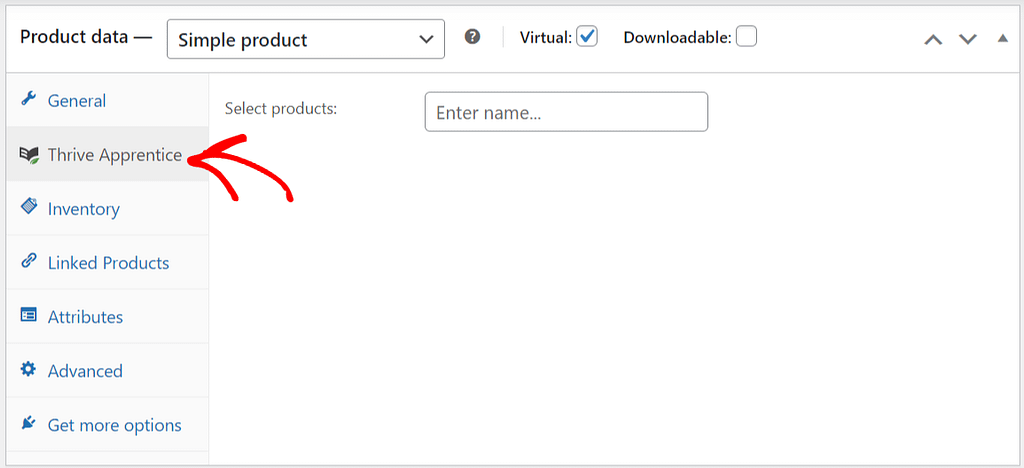
When you open the Thrive Apprentice option, select the Thrive Apprentice product from the dropdown.
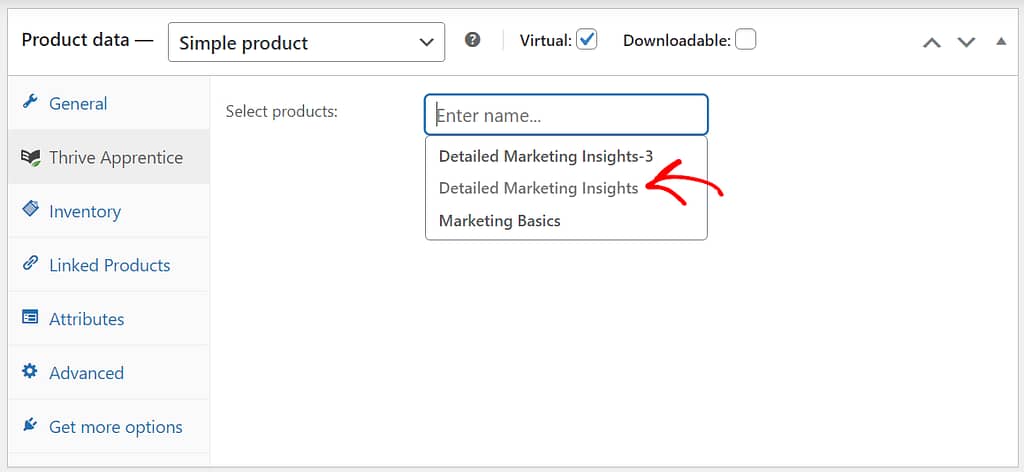
Note: Please ensure the Thrive Apprentice product is published before you select it in the WooCommerce dashboard.
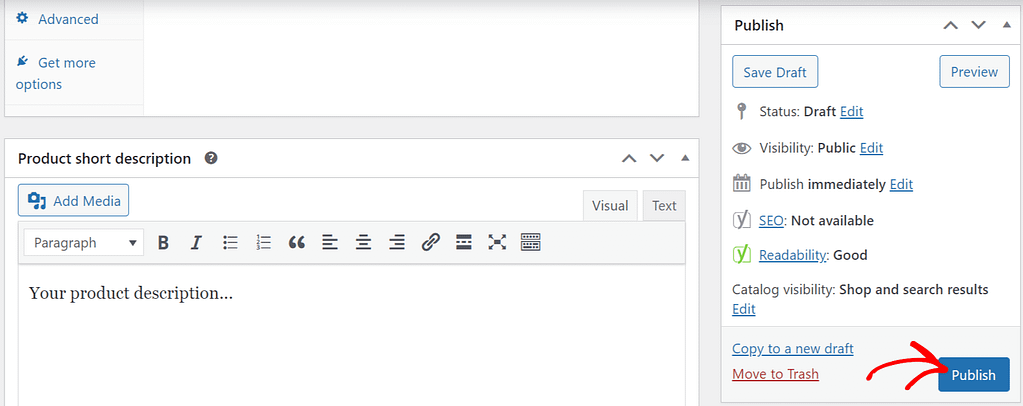
After you’ve selected the product, click the Publish button to publish your WooCommerce product.
Now that your Thrive Apprentice and WooCommerce products have been created and configured, you can set up the final step of the process: making sure your users land on the product page to buy it.
Redirecting Users to the Thrive Apprentice Product Page
You must redirect the user to the product page to sell a Thrive Apprentice course.
Let’s consider you have a landing page about the product and its courses. This page will also have a call-to-action or calls-to-action, which will take users to the product page when clicked.
Fetch the Product URL
To fetch the product URL, open your WordPress admin area, navigate to Products >> All Products, and click Edit under the product name you want to access.
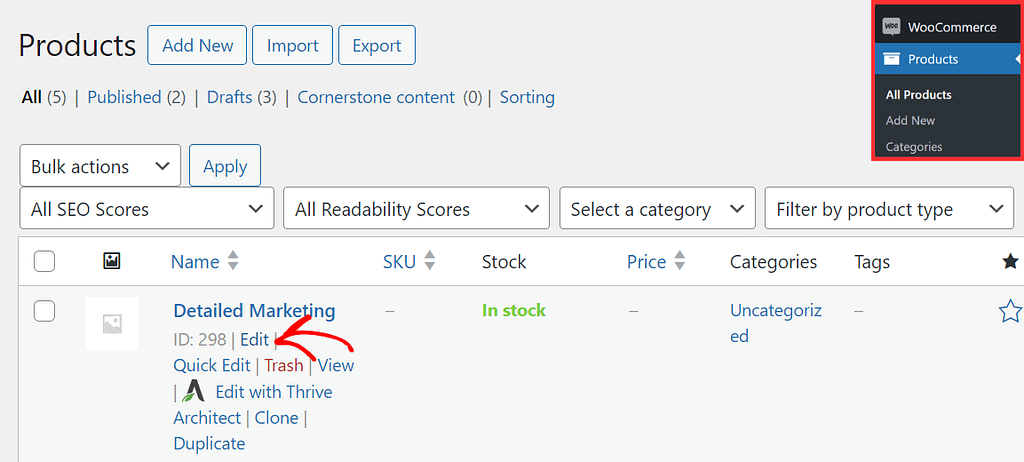
In the product editor, under the product name, copy the URL beside the Edit button.

Insert the Product URL in the Call-to-action
When you copy the URL, it’s time to use it in a call-to-action.
Let’s say you have a landing page with a call-to-action button to which you should add this link.
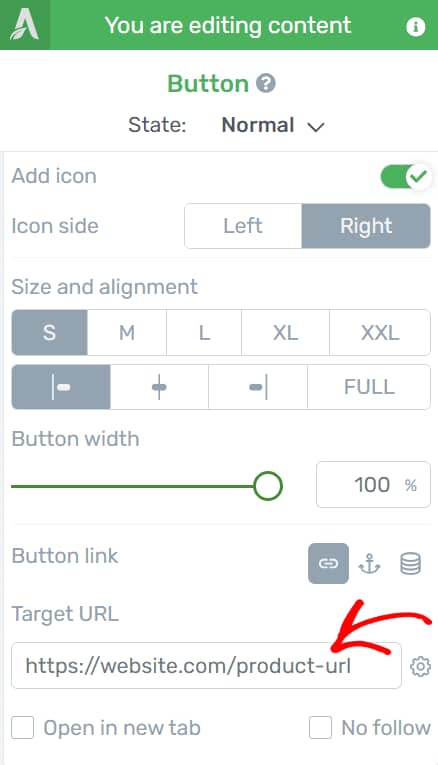
To begin, open the page in the Thrive Architect editor, scroll down to the call-to-action section, and click on the button to which you want to add the link. This will open the button’s Main Options in the left column.

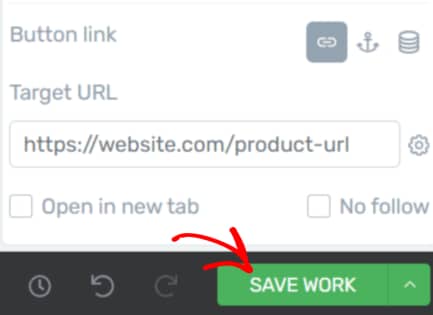
Under the button Main Options, scroll down to the Button Link section and enter the Product URL in the Target URL field.
After you enter the URL, click the Save Work button to save the page.
Configure Product Access Restrictions in Thrive Apprentice
Once you are done creating the product in Thrive Apprentice and WooCommerce, you’ll need to manage the Access Restriction Rules to control what users see when they aren’t logged in or haven’t purchased the product.
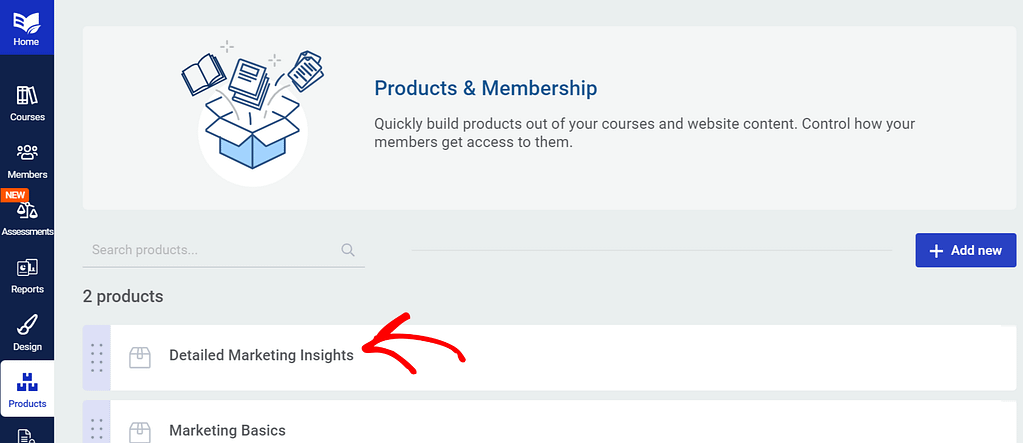
To configure a product’s access restrictions, open your WordPress admin area, navigate to Thrive Dashboard >> Thrive Apprentice, and click Products.
On the Products page, click on the product you want to apply the access restriction rules.
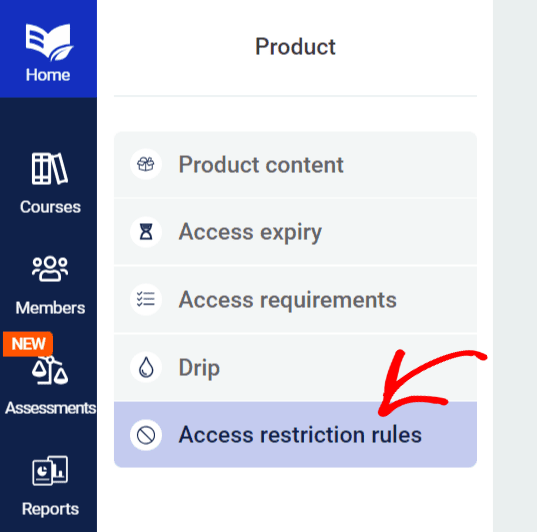
When you open the specific product page, click the Access restriction rules.
On the Access Restriction rules page, check the Standard context section and click default site behavior beside User not logged in.
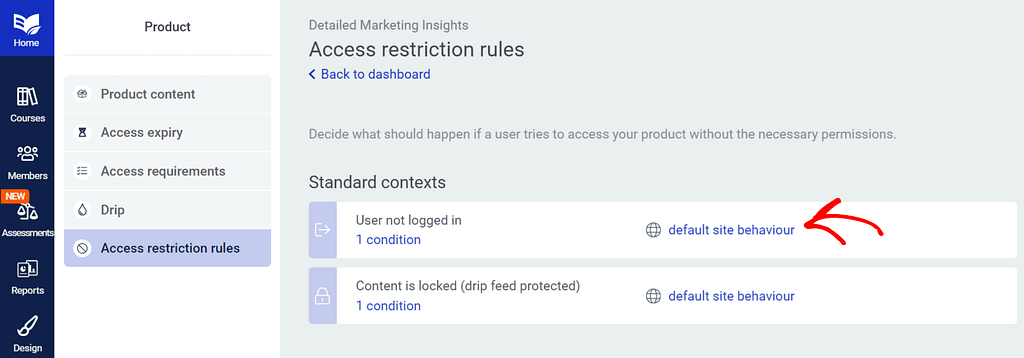
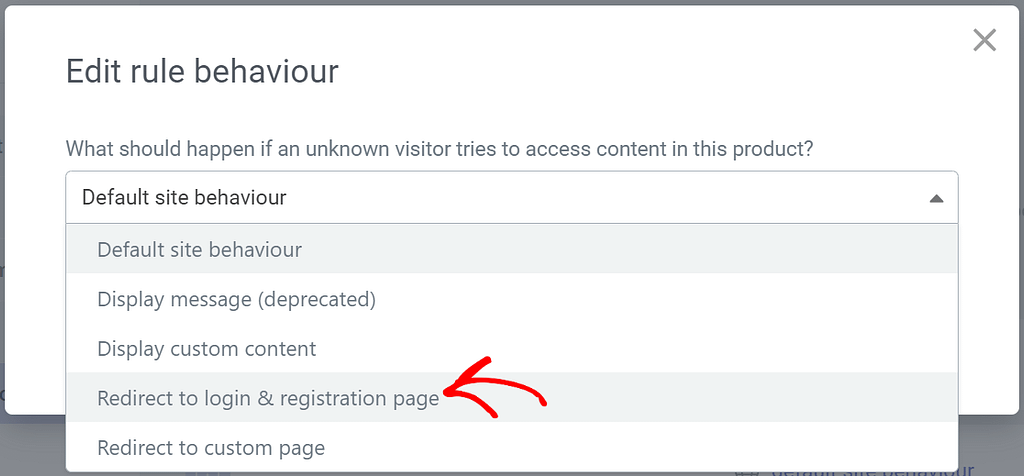
When you click this setting, a popup will appear where you can select what should happen if an unknown user tries to access the product’s content.
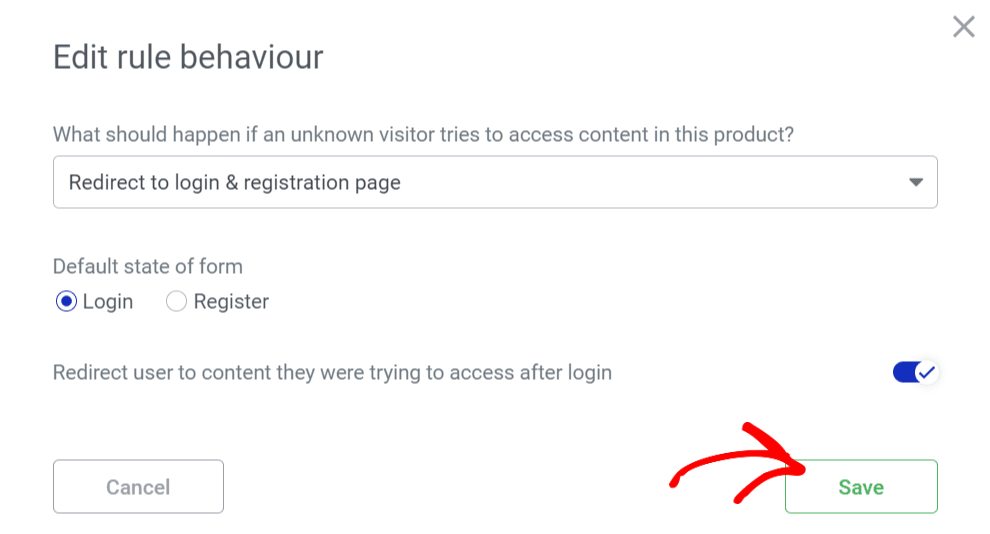
On the popup, select “Redirect to log in or registration page” in the dropdown, select the form’s default state, and then enable the slider to redirect users to the content they were trying to access after logging in.
After you are done setting the redirection, click Save.
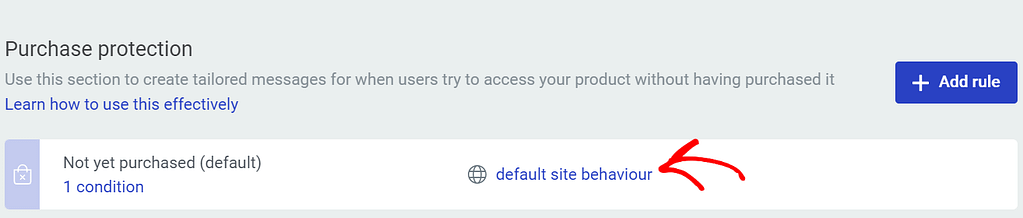
Similarly, you can add an access restriction for users who haven’t purchased the product under Purchase protection.
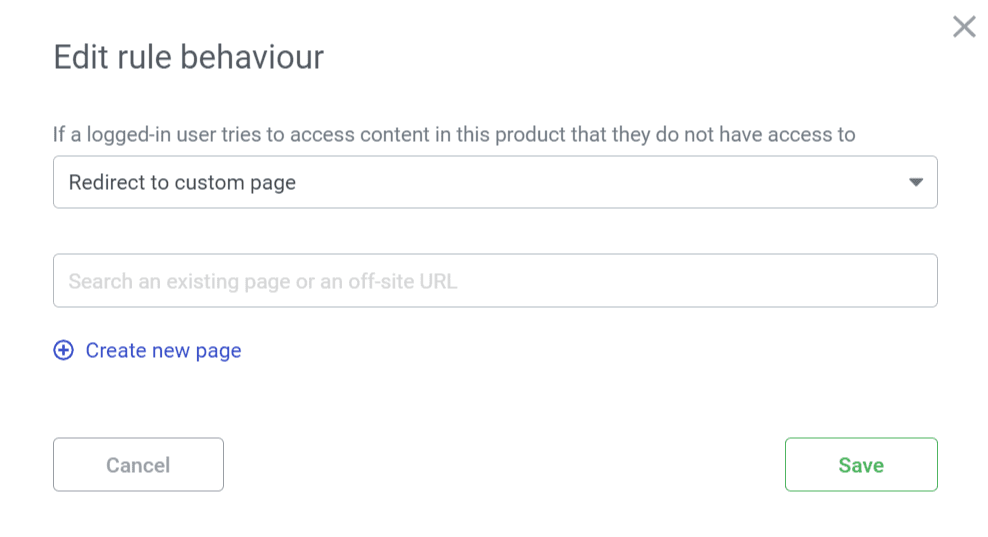
Under the product protection section, click default site behavior beside Not yet purchased.
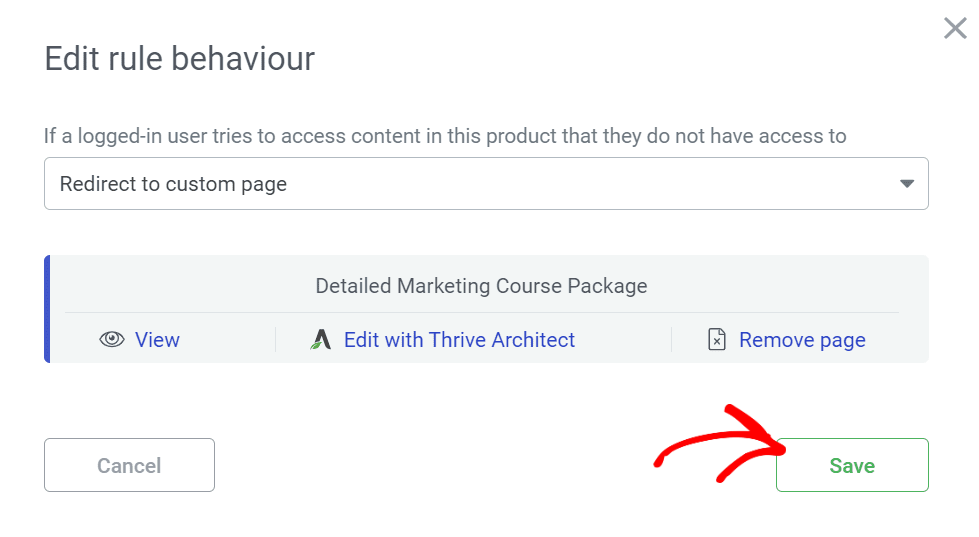
You can change the default site behavior to redirect users to a custom purchase page by selecting Redirect to Custom Page in the dropdown.

When you redirect users to a custom page, you can start typing the page name you’ve already created in the field below. If you do not have an existing purchase page, click on Create new page to create a new page.
After you enable redirection to the selected custom page, click the Save button.
Once you have completed the access restriction rules, you can be assured that non-logged-in users will be redirected to a login or registration page, and users who have not purchased will be redirected to a custom purchase page.
This is one way to integrate with WooCommerce to sell courses built with Thrive Apprentice.
Next, you can customize your WooCommerce templates using Thrive Theme Builder. Here’s an article that will help you with that.