Regardless of whether you are customizing a WooCommerce template in Thrive Theme Builder or a WooCommerce page in Thrive Architect, there are several elements that you can use to change the aspect of your online shop.
Such an element is the “Product Categories” one, which allows you to display on your pages and posts the product categories that you’ve set up in WooCommerce.
The purpose of this article is to explain how to use this element and all of its options.
First and foremost, you should first make sure that you have properly installed and activated the WooCommerce plugin on your website.
We have a dedicated section in our knowledge base about how to install and use this plugin, so don’t hesitate to check it out first if you need to read more about this plugin.
Add the Element
The “Product Categories” element works just like any other Thrive element.
Open the page, post, or template you want to edit, and then click on the plus sign from the right sidebar:

For this example, I will be adding the element to a page.
Look for the “Product Categories” element in the WooCommerce section of your right sidebar:

Once found, drag and drop the element to the desired location on your page:

The “Main Options” of the element will appear in the left sidebar, as usual:
Edit Form Elements
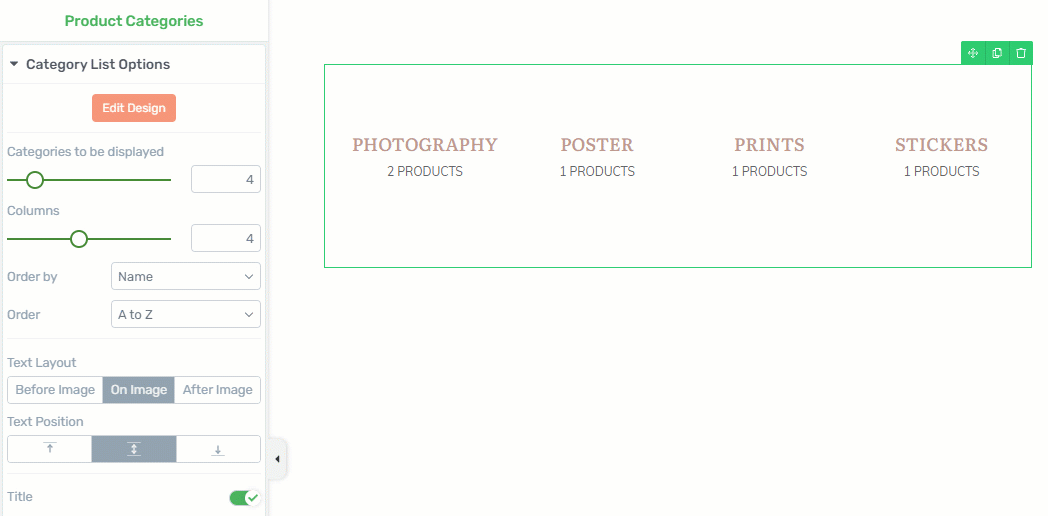
The first thing you can do in the “Main Options” sidebar is to customize the design of the category list by clicking on the “Edit Design” button:

This will open another set of options in the sidebar:
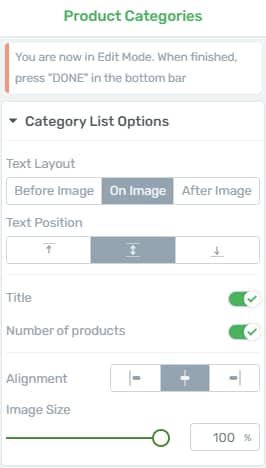
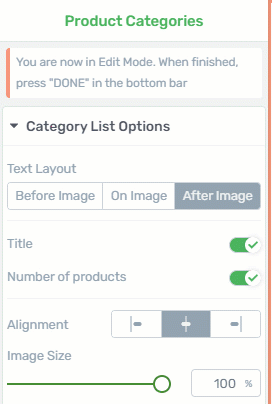
Text Layout
There are three different options you can choose here, depending on how you want to display your text: it can be displayed before, on, or after the image:
Depending on what you choose, the location of the image within the list will change:

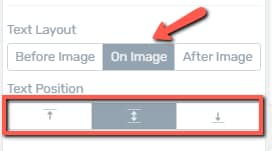
Text Position
This option is only available if you select the “On Image” option for the text layout:
You can next change the position of the text, and decide whether you want a top, centered, or bottom position:
Title
By activating the toggle next to “Title” you choose to display the name of each category within your list:

Number of products
If you activate this option, then you can display the number of products available in each category:

Alignment
This option allows you to choose a left, center, or right alignment for your categories:

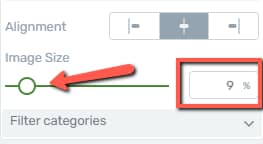
Image Size
Lastly, from the “Image Size” slider you can increase or decrease the size of the product image:

If you don’t want to use the slider, you can always choose to enter a percentage in the field next to the value.
Furthermore, if you want to edit each item of the category list individually, you can do so. Simply click on the item you want to edit, and its corresponding options will appear in the left sidebar.
-
Product Category Thumbnail
You will be able to see exactly what is selected in the breadcrumbs. If you click on the image, the “Product Category Thumbnail” will be visible in the breadcrumbs letting you know that you are editing the thumbnail:

The corresponding options will appear in the left sidebar, and you can use them to customize the thumbnail:

-
Product Category Title
Selecting the “Category Title” will mean that you will be able to edit the typography and other aspects of the text:

In the left sidebar, you will be able to use the following options:

-
Product Category Count
Just as in the case of the title, this too is a text element that you can customize:

Once you select it, the corresponding options will appear in the left sidebar:

When you are finished with customizing the design of the element, click on one of the two available “Done” buttons to return to the “Main Options” sidebar:

Use the Main Options
You can further customize the element with the rest of the options available in the left sidebar:
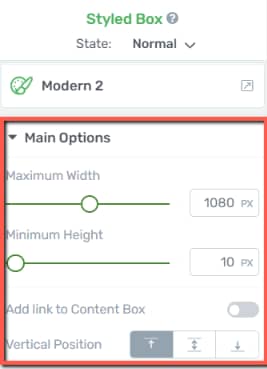
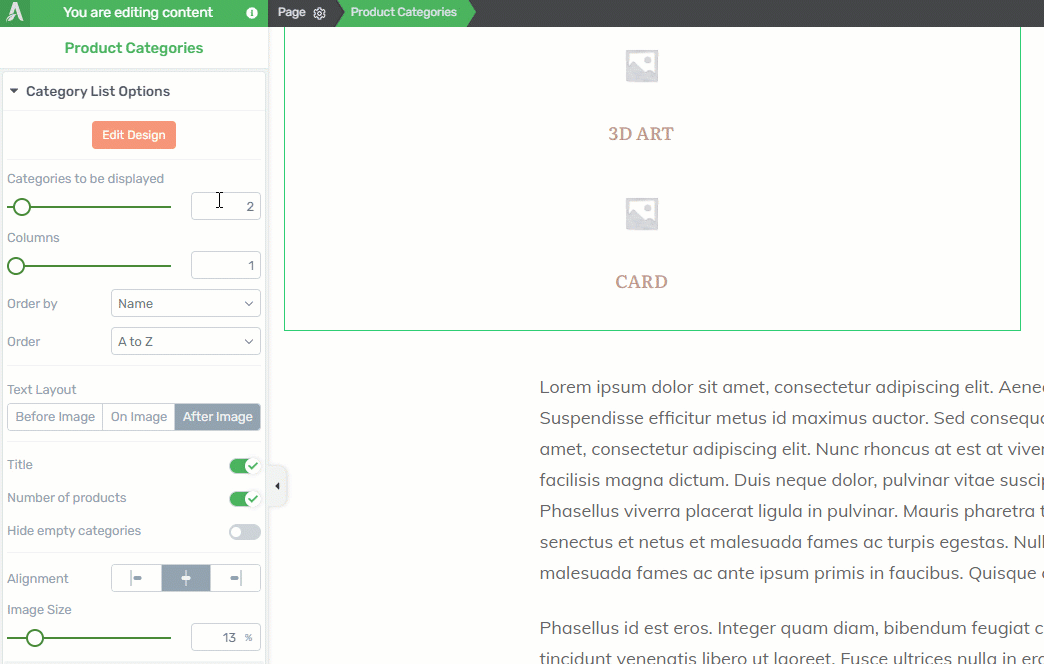
Categories to be Displayed & Columns
You can use the sliders or the numerical fields next to each of these two options to decide the number of categories you want to display in your list, and in how many columns you want to have them displayed:
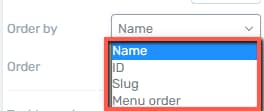
Order By
From the “Order By” drop-down field, you can set the order of the categories. Click on the drop-down to open it:
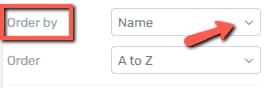
You can choose to order the categories by “Name”, “ID”, “Slug” or “Menu order”:
Order
If you open the drop-down list, you will be able to arrange the categories alphabetically:

Text Layout
From here you can change the position of the text within the current layout:
Text Position
Just as in the case of the options available in the “Edit Design” mode, here as well, the “Text Position” feature becomes available when the layout of the text is set to “On Image”:
Title
If you want to display the name of each category, you can enable the toggle next to “Title”:
Number of products
This toggle will display or hide the number of products available in a category:

Hide empty categories
This option does exactly what its name says – if you activate the toggle, the categories which do not have any product in them will be hidden:
Alignment
You can also decide the type of alignment you want for the categories, and opt for a left, centered, or right alignment :
Image Size
The image size can be changed as well, either by using the slider from left to right to increase or decrease the size or by inserting a percentage in the field next to the slider:
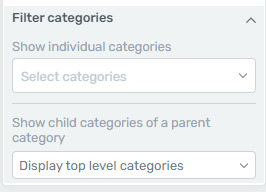
Filter categories
Click on the downwards pointing arrow next to “Filter categories” in order to view the full list of options:

This will trigger two additional dropdowns:
-
Select categories
Open the first drop-down, in order to view the full list of individual product categories:

If you select one of the categories, then the list will be filtered in order to display only the selected category:

-
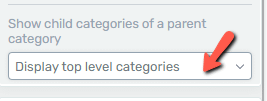
Display top-level categories
Open the second drop-down in order to view the parent categories you have set up in your WooCommerce shop:
If you have set up child categories, then you can display them by selecting their parent from the list.
For example, I have a parent category (top-level category) called “Photography”, and within it, I also have a child category called “Wallpapers”:
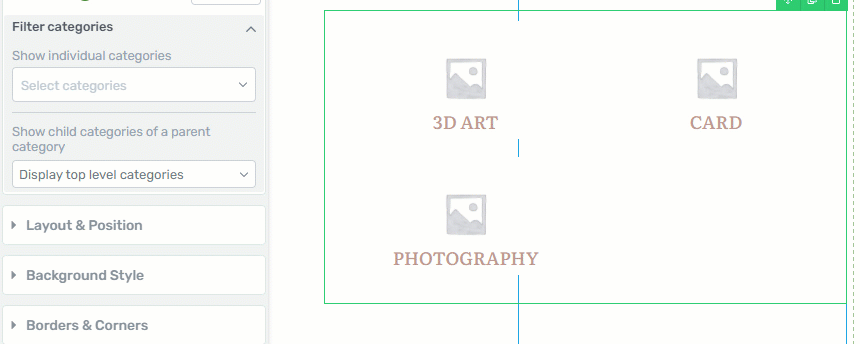
By choosing the parent category from the drop-down list, the child category assigned to the main category has been displayed in my product category list.
Rest of Main Options
Besides the “Edit Design” or the “Main Options”you can also use the rest of the “General Options” to further edit the element, such as the “Borders & Corners” option, “Layout & Position”, etc. We have separate articles for all of them, which can be found in our knowledge base.
These were the ways in which you can customize the “Product Categories” element.
In addition to these steps, there’s one more thing worth mentioning here: besides the “Product Categories” element, you can also use the “Product Categories” template from Thrive Theme Builder:
Feel free to check it out if you want to learn more about the multiple ways in which you can display your products and your product categories on your website.
I hope this article was useful to you. If that’s the case, make sure to reward our efforts by leaving a smile below. 🙂