When customizing a template in Thrive Theme Builder, regardless of what type of template it is, you can use the “Main Options” section from the left sidebar in order to choose which part of the post or page you want to edit.
The very first thing that needs to be done is to open the Thrive Theme Builder editor. This is where you can play around and customize your posts or pages just as you wish.
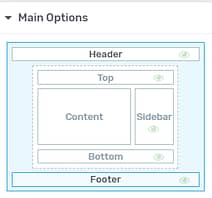
Once you access the editor, on the left sidebar, you will notice the “Main Options” section:
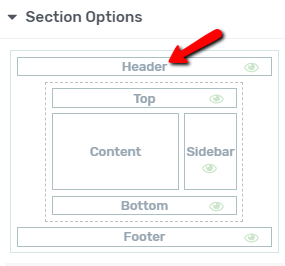
To choose the section that you want to edit, simply click on it. In this case, click on “Header”:
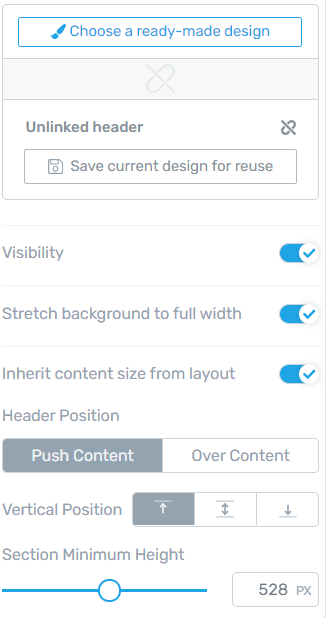
Once you select a section, its options will appear in the left sidebar:
Use the Header Options
When you first start using Thrive Theme Builder, you can set up the Site Wizard (also explained in this article), in order to help you get started.
If you follow the wizard, you will notice that the second step, called “Header”, allows you to add a “Header” section to your template directly from there, without having to open the editor.
Because of this, when editing a “Header” section using the Thrive Theme Builder editor, the editing process depends on whether you have already gone through the Site Wizard before entering the Theme Builder editor, and have chosen a “Header” section from there, or not.
Therefore, there are two possible situations here:
-
the first situation is if you have gone through the Site Wizard and you set a “Header” section from there.
In this case, when you access the Thrive Theme Builder editor, you will not be able to edit the “Header” section or add any elements to it, unless you enter the “Edit Mode”. The way to do that is to select the “Header” section and click on “Edit”:
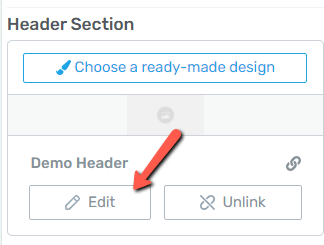
When you do that, you will be taken into “Edit Mode”. You can find information about how to customize the section in the “Edit Mode” in the next paragraph.
-
the second situation is if you did not choose a “Header” section from the Site Wizard.
In this case, when you edit a template, as you do not have a “Header” section applied, you will be able to edit the section without having to access the “Edit Mode”. You can add elements, customize it as you wish, and then you can save the section for later use.
Use the “Edit Mode”
There are a few ways in which you can customize the section in the “Edit Mode”.
Use the options from the left sidebar
Firstly, you can use the options found in the left sidebar:

You can find more information about how to use these a bit later in the article.
Add elements and Global Information to the “Header” Section
Besides using the above-mentioned options, you can add various elements to the section. In order to do that, click on the plus sign to open the list of elements. Drag and drop each element you want to add inside the section. When you place an element inside the “Header” section, its options will appear on the left sidebar.
After you customize each element, you can go back to the “Edit Mode” of the “Header” section by clicking on “Header” in the breadcrumbs:
Moreover, you can insert global information, which can come in very handy, when building your site. You can do that by using the “Global Fields” feature.
Note: Whenever you want to use global information, make sure that you have first set up the “Global Fields” information from your WordPress Admin Dashboard. If you are not sure how to do that, you can find out here.
For example, if I want my company address in the header, I can easily do that.
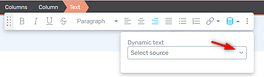
Firstly I have set the “Company Address” global field in the Thrive Admin Dashboard. Then, in the “Header” section, I will insert a “Text” element, and then go to the “Dynamic Text” option.
Here, if I choose “Global Fields” as a source, as well as select “Company Address” in the second field, the address will be added to the “Header” section, like so:
This way, it is very easy to incorporate global information inside a “Header” section.
These are the ways in which you can edit the section using the “Edit Mode”.
When you’re done using the “Edit Mode”, click on the orange “Done” button, in order to go back to the section options.
After customizing a “Header” section, you are able to save it and use it later, in other templates.
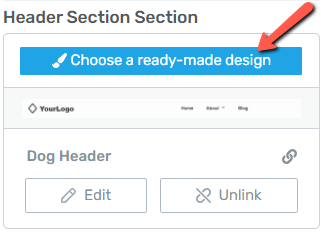
If you want to use another section, you can do that as well, with the use of the “Choose a ready-made design” option. This means that, if you want to change your “Header” section, you can replace it with a pre-built one.
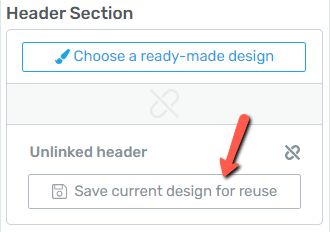
Save current design for reuse
As mentioned above, it is very easy to save a section and use it in other templates. If you want to do that, click on the orange “Save current design for reuse” button:
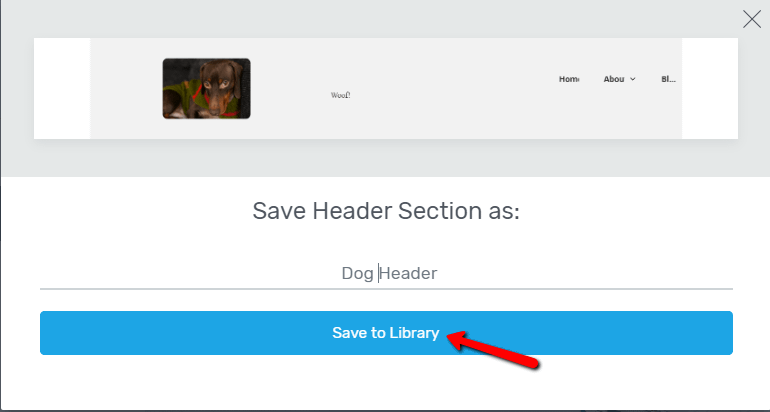
Then, you will be shown a small preview of the section and you will be asked to name it. After you do that, click on “Save to Library”:
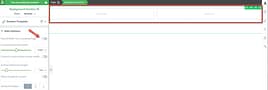
This will save the “Header” section under the “My Saved Header Sections” part of the pop-up:
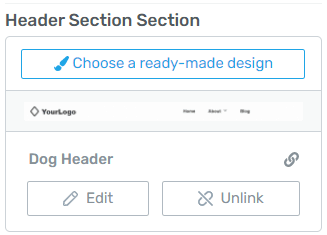
After saving a “Header” section, you will notice that you can replace it, edit it, or unlink it:

-
The “Choose a ready-made design” option works just as described below.
-
If you choose “Edit”, you will enter in the “Edit Mode”, just as mentioned above.
-
The “Unlink” option comes in handy, if you want to make modifications to the “Header” section without affecting the other templates, where the same “Header” section is used.
This is because if you unlink the “Header” section, the modifications you apply to it will not be applied to the other templates where the same saved section is used. They will only be applied to the “Header” section (and the template) that you are editing at the moment.
Also, after you choose a “Header” section, only a few options will be available. However, if you unlink the section, you will be able to use the rest of the options, described below.
Choose a ready-made design
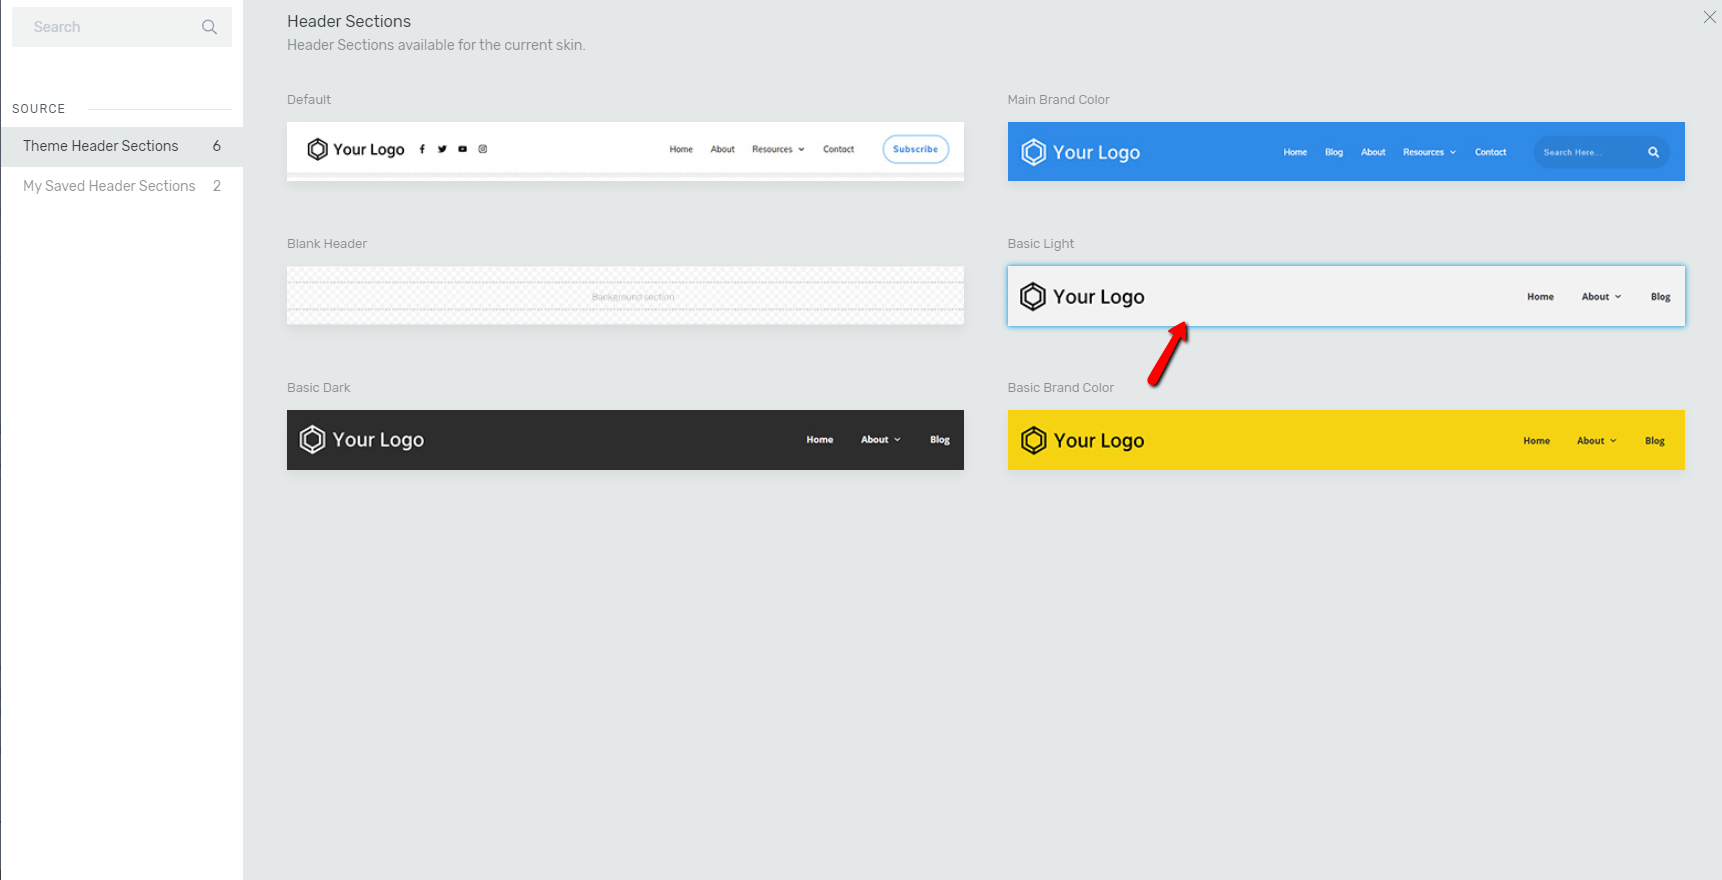
If you want to choose another “Header” section, click on “Choose a ready-made design”:

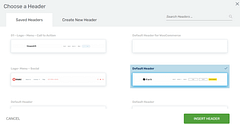
This will open a pop-up where you can choose a new one from:
The sections will vary depending on the theme that you have previously decided to use. On the left side of this pop-up, you will be able to change the “Source”:
This means that you can either choose one of the pre-built “Header” sections, or you can use one of your saved sections.
If you want to place the a “Header” section that you have previously saved, simply click on “Replace” and look for the “Header” section inside the “My Saved Header Sections” tab, under the “Sources” section of the pop-up:
In order to choose a “Header” section, click on it and it will automatically apply, and the pop-up will close:
After choosing the suitable “Header Section” for your template, whether you’ve chosen one that comes with the theme, or you’ve used one of your own, you can start using the rest of the “Header Options”:
Use the other “Header” section options
Visibility
The first option is the “Visibility” one. This is an option that allows you to hide the “Header” section if you don’t want it to be shown.
By default, this option is activated. If, however, you want to disable it, meaning that you do not want to show the “Header” section, simply click on the switch next to the option:

Note: Another way to change the “Visibility” setting is by clicking on the eye icon from the “Main Options” section of the left sidebar:
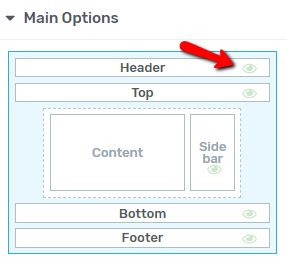
If you click on it and hide the section, the eye icon will become red, letting you know that the section is not visible. If you want to switch it to visible, simply click on the icon again.
Stretch Background to Full Width
Next, you can use the “Stretch the background to full width” option. If you want to activate the option, which, by default, is disabled, click on the switch next to it:

Here is an example of how the “Header” section looks like without activating the option:

And this is how the section looks like after I have activated the option:

Inherit content size from layout
Another option that you can choose is if you want the size of the section to be inherited from the layout. The option is enabled by default. If you do not want the size of the section to be inherited from the layout, click on the switch button next to the option in order to disable it:

If you do that, two more options will appear in the left sidebar: “Content Width” and “Stretch content to full width”. This means that you can either manually choose the width of the “Header” section, or you can turn on the “Stretch content to full width” option.
Content Width
If you want to choose the width, simply drag the slider from side to side, or manually enter a numerical value in the box next to the slider:
Stretch content to full width
If you want to activate this option and stretch the content of the “Header” section to full width, click on the switch next to the option:

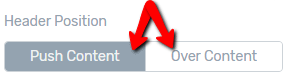
Header Position
The next option is the “Header Position” one. There are two options available here, “Push Content” and “Over Content”:
-
Push Content: If you choose this option, the “Header” section will be placed above the content that comes after it
-
Over Content: this option places the “Header” section on top of the content that comes next. Keep in mind that it will cover the content, unless you, for example, reduce the opacity of the “Header” section background.
Vertical Position
You can choose how the content of the “Header” section should be positioned vertically. Choose one of the three options by clicking on the one that best fits:

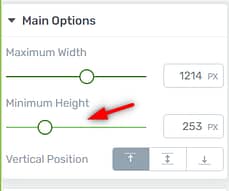
Section Minimum Height
The last option available in the “Header Options” section is the “Section Minimum Height” option. You can play around with the height of the “Header” section by dragging the slider from side to side, or by manually entering a numerical value in the field next to the slider:
This was how you can easily customize the “Header” section with the use of the “Header Options” found in the left sidebar.
Besides these, you can further customize the “Header” section with the rest of the general options, such as “Scroll Behaviour” or “Decorations”, all for which we have separate articles in our knowledge base.
If you want to find out more information about how to use and customize other sections or elements using Thrive Theme Builder, make sure to check out the dedicated section from our knowledge base.
I hope you found this article useful. If that’s the case, make sure to reward our efforts with a smile below 🙂