Do you want to use third-party custom or Google fonts with Thrive Architect on your website? You can import and use them with the help of a free plugin called Custom Fonts.
Furthermore, loading Google fonts from your server rather than the Google server helps improve website performance since no additional requests are sent to and from the server. It also helps stay compliant with the GDPR law since the user’s IP address won’t be shared with the Google server any longer.
In this article, we’ll show you how to use custom fonts and Google Fonts with Thrive Themes.
- Sources of Custom Fonts
- Installing the Custom Fonts plugin
- Adding Google Fonts to the Website Using Custom Fonts Plugin
- Adding Custom Fonts to the Website Using Custom Fonts Plugin
- Using Google/Custom Fonts on a Page/post
- Disable Google Fonts Connection Through Thrive Dashboard
- Disable Google Fonts Connection From the Project Lightspeed Section
Sources of Custom Fonts
Custom fonts can be downloaded and used from different sources, like the ones listed below.
Installing the Custom Fonts Plugin
The Custom Fonts plugin will help upload the fonts and use them on a website. So, let’s begin by installing the Custom Fonts plugin.
To get started, log into your WordPress website, navigate to Plugins >> Add New, and start typing the plugin name in the search field seen on the top right of the screen.
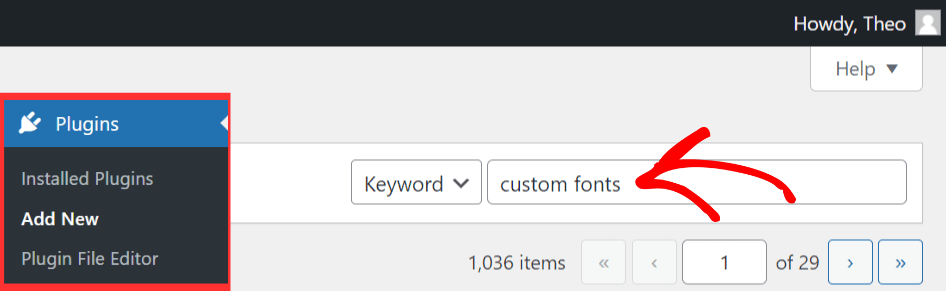
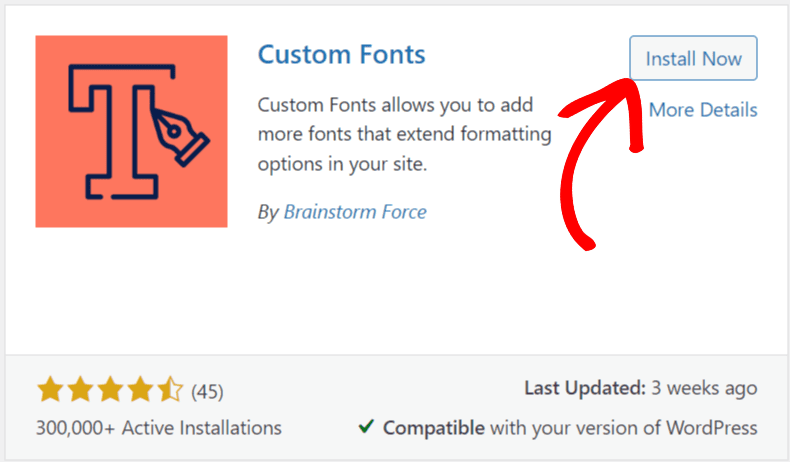
When you enter the plugin name, you’ll find it one among the search results. Click on the Install Now button to begin the installation.
After installing the plugin, it’s time to activate it so you can start using it on your website. You can do so by clicking the Activate button.
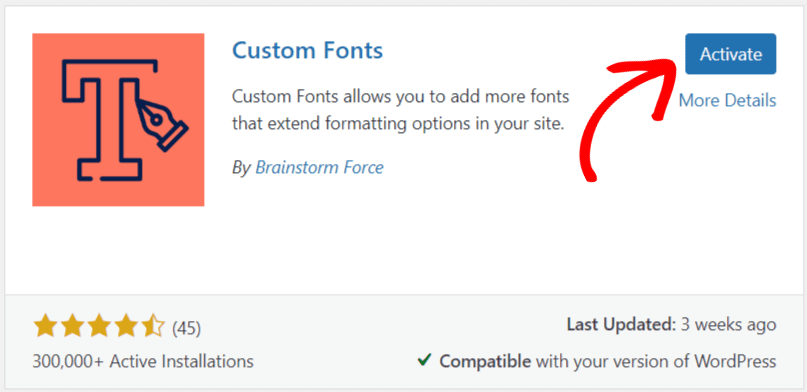
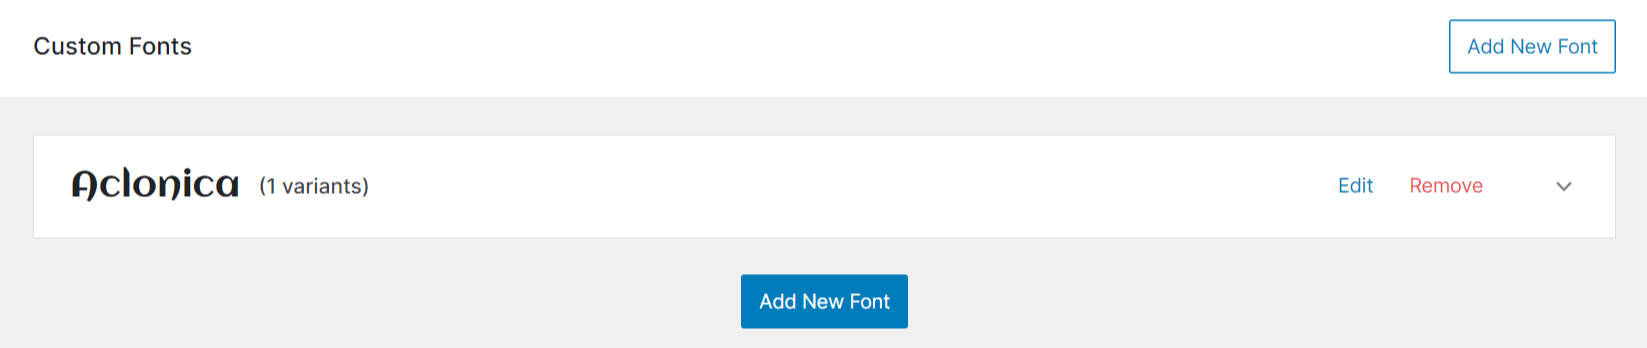
The Custom Fonts plugin is now installed and activated on your website.
Adding Google Fonts to the Website Using Custom Fonts Plugin
When you’ve installed and activated the Custom Fonts plugin, you can now upload the font using the plugin.
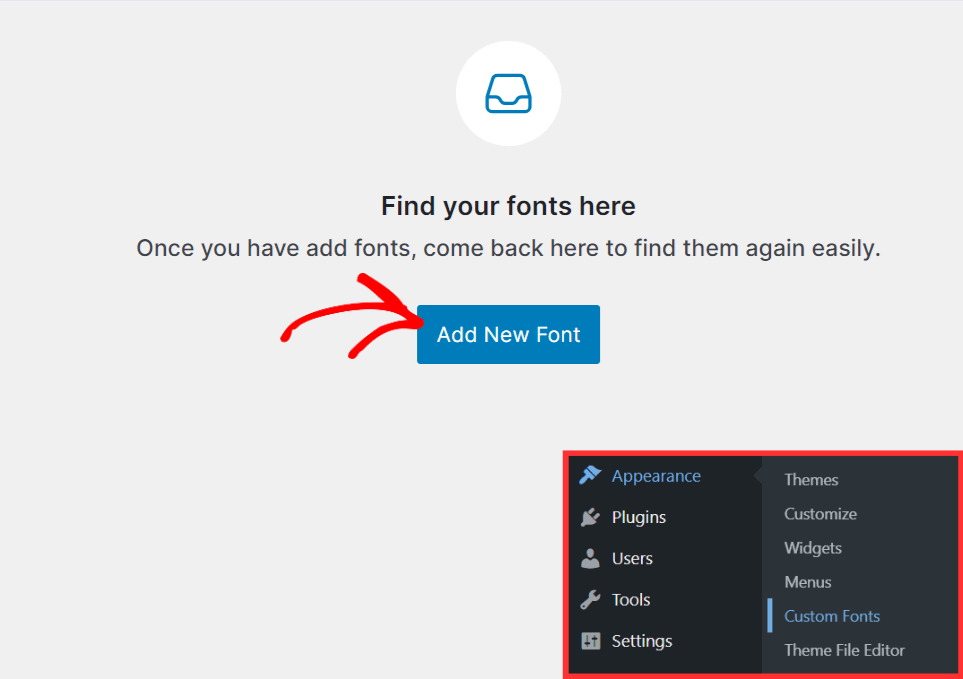
To begin uploading the font, log into your WordPress website, navigate to Appearance >> Custom Fonts, and click the Add New Font button.
On the following screen, select the Google Fonts tab in the left panel.
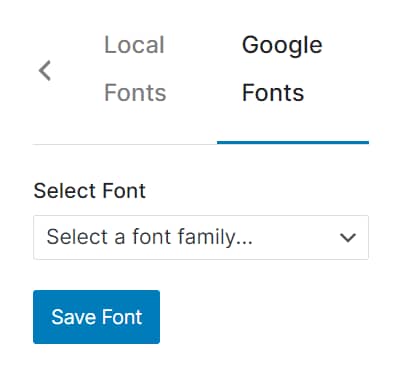
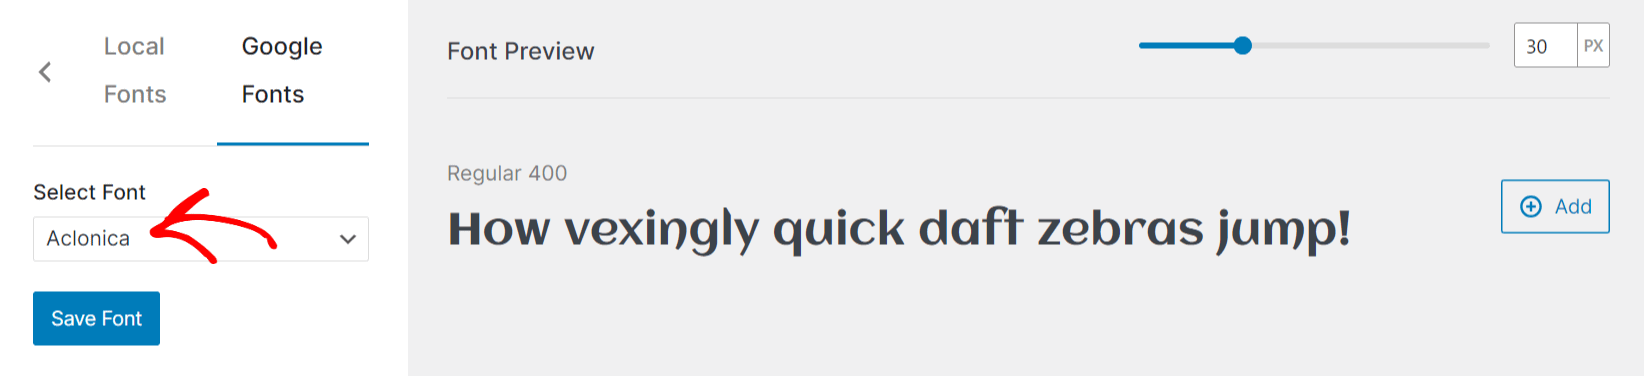
Under this tab, select the font family in the dropdown.
Once you select a font family, you’ll also be able to see the font preview on the right side of the screen.
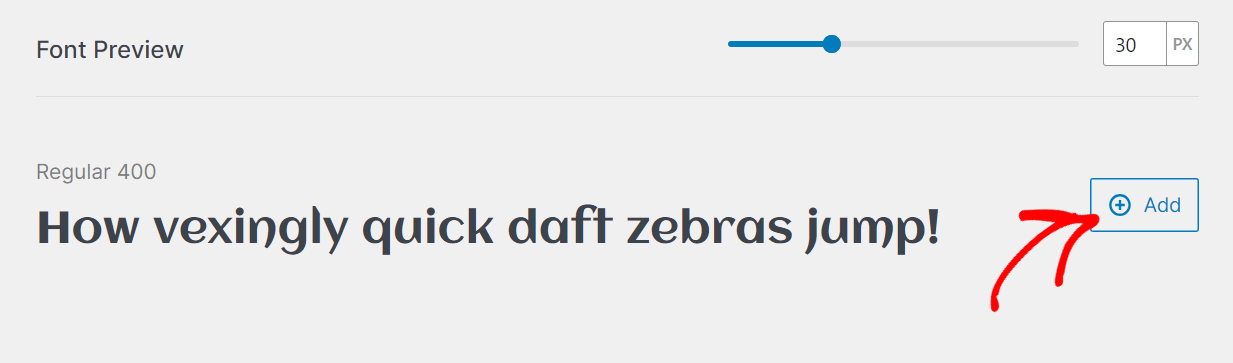
When you select the font you need, click the Add button beside the Font preview.
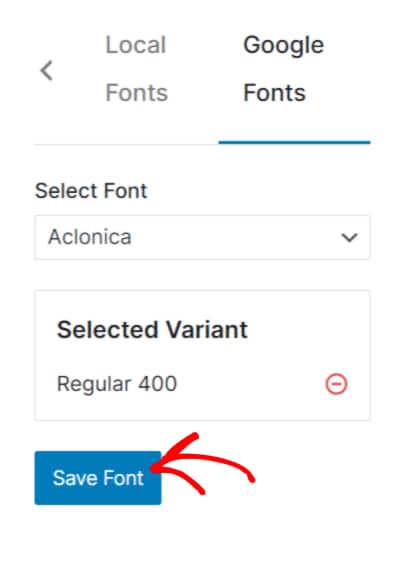
After clicking the button, you’ll see the variant added in the left panel. To use this font on your website, click the Save Font button in the left panel.
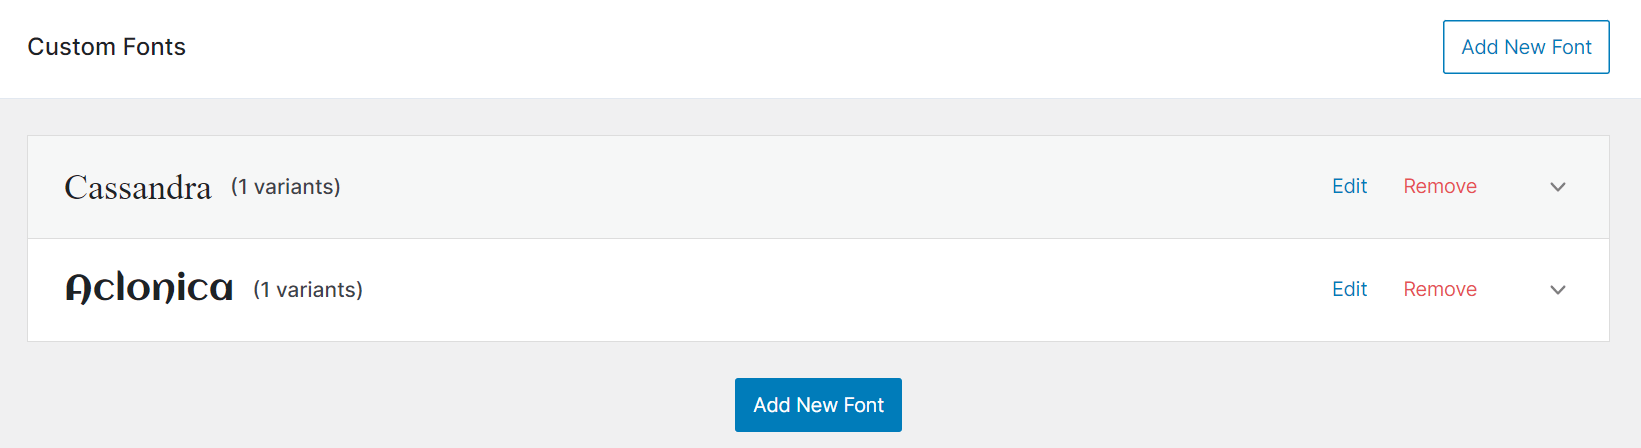
After clicking the button, you’ll see the Google Font added on the Custom Fonts page.
Adding Custom Fonts to the Website Using Custom Fonts Plugin
Like Google Fonts, you can upload a local font file using the Custom Fonts plugin.
To begin uploading the font, log into your WordPress website, navigate to Appearance >> Custom Fonts, and click the Add New Font button.
On the following screen, select the Local Fonts tab in the left panel.
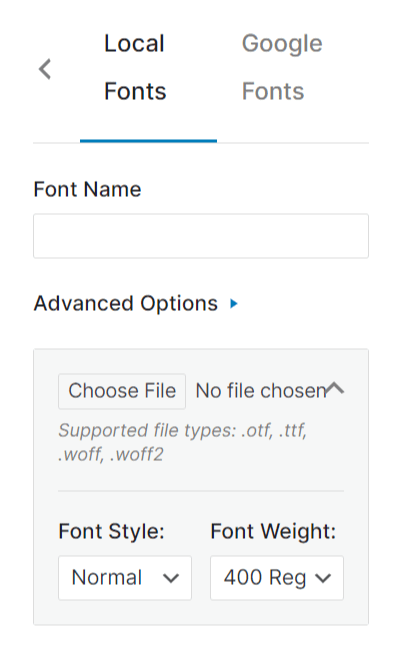
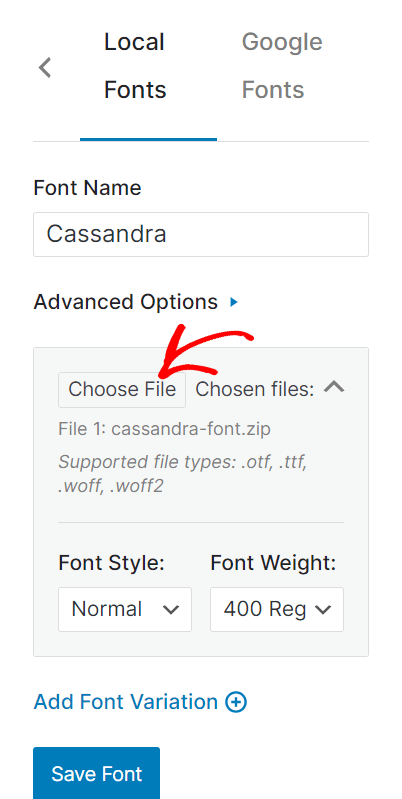
In the Local Fonts tab, enter the font name and upload the font file by clicking the Choose File button.
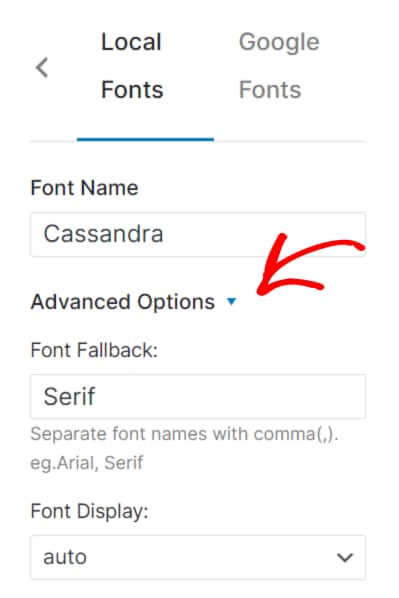
When you expand the Advanced Settings, you can enter a Font Fallback among Serif, Sans-serif, Monospace, Cursive, and Fantasy.
This is where you can also add value to the Font Display property. The values include
- Auto (default): allowing the browser to use its default method for loading the font.
- Block: Instructs the browser to hide the text until the font fully loads.
- Swap: Instructs the browser to use the fallback font to display the text until the custom font fully loads.
- Fallback: Allows the browser to hide the text for about 100ms and uses the fallback text if the font has not yet been downloaded.
- Optional: Tells the browser to hide the text initially, then transition to a fallback font until the custom font is available.
If you plan to add more variants, you can do that by clicking on the Add Font Variation link.

Once you are done with all these settings, click the Save Font button. You’ll see the font added to the Custom Fonts page.
Using Google/Custom Fonts on a Page/Post
After downloading a font and uploading it to your website, let’s see how you can use it in a page or post built using Thrive Architect.
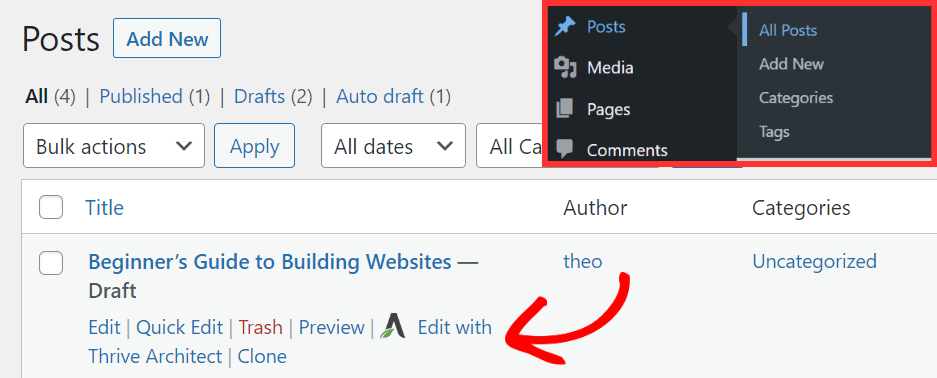
To start using the font, log into your website, navigate to Posts >> All Posts, hover over the post you want to edit, and click Edit with Thrive Architect.
In the Thrive Architect editor, select the text you want to apply the font to, and under Main Options, click Font settings, in the left-side panel.

In the popup that appears, select the Source as Custom Fonts plugin and the respective font in the second dropdown.

Once you select the font, click the Apply button.

The font is now applied to the selected text!
After formatting the post content, click the Save Work button at the bottom left of the screen.
Disable Google Fonts Connection Through Thrive Dashboard
If you’ve selected a Google Font using the above steps, you no longer need a connection with the Google server to fetch these fonts.
Disabling the connection will block the Google API, preventing the transfer of information like the IP address.
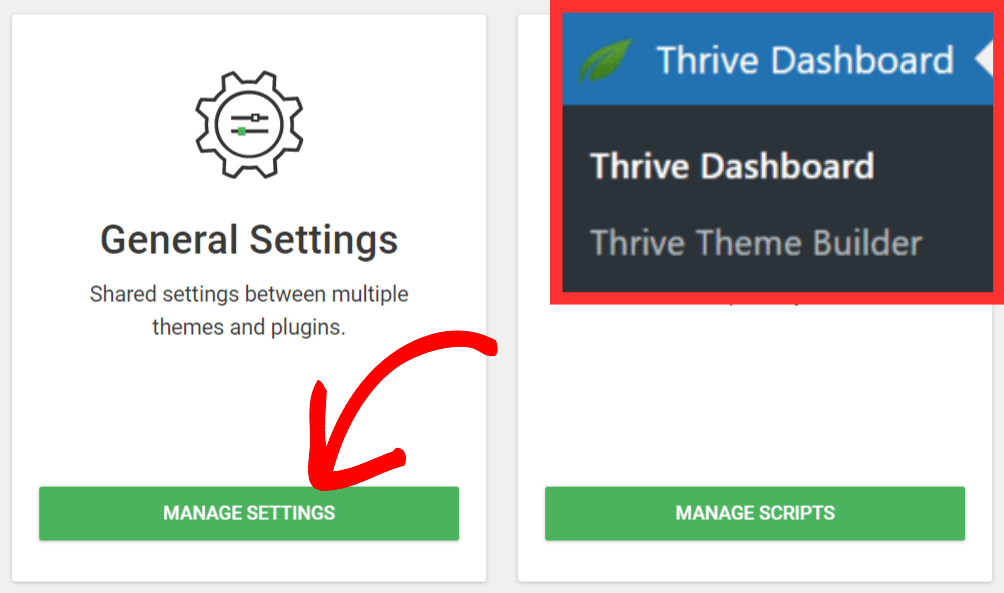
To disable the connection to the Google server, log into your website backend and navigate to Thrive Dashboard >> Thrive Dashboard. On this page, scroll down to General Settings and click the Manage Settings button.
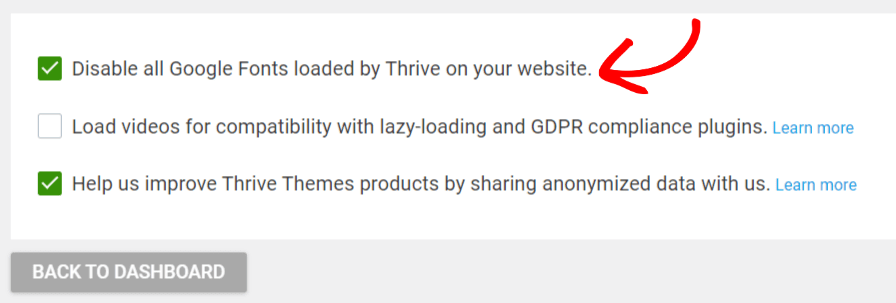
On the General Settings page, scroll down and check the box to Disable all Google Fonts loaded by Thrive on your website, and then click on the Back to Dashboard button.
You can activate or deactivate this option anytime by checking or unchecking the checkbox next to it.
Need further help and detail about disabling Google Fonts loaded by Thrive Architect. You can read our document to know more.
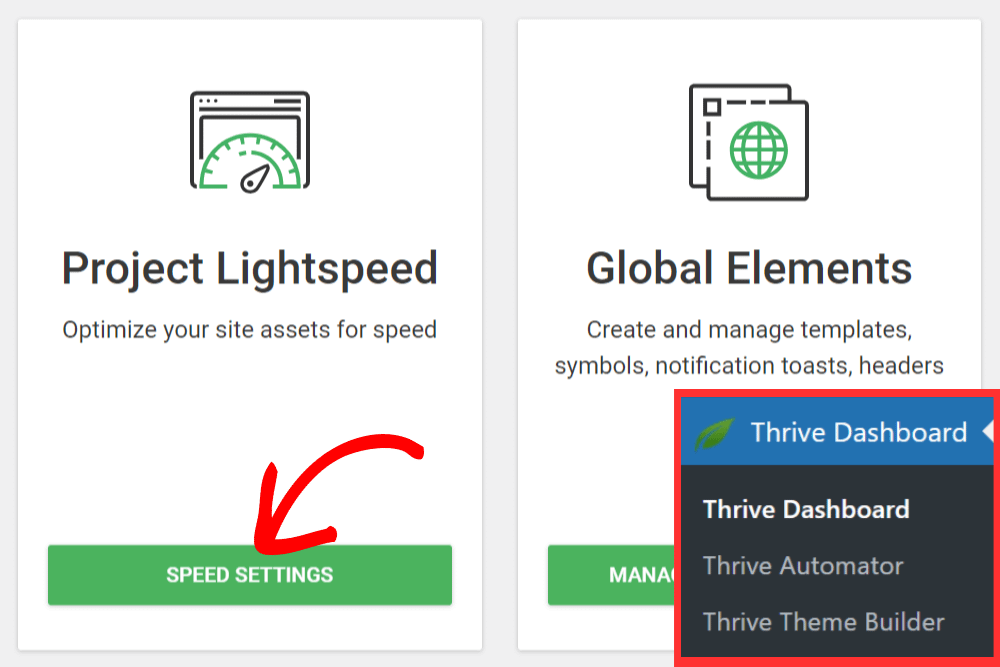
Disable Google Fonts Connection From the Project Lightspeed Section
The Project Lightspeed section in Thrive Themes is where you can monitor optimization to ensure your website performs well.
When importing Google Fonts through its server, all the Google Fonts on a page are loaded via multiple HTTP requests (one request/font). Therefore, when you load Google Fonts locally using the Custom Fonts plugin, you can disable the API connection to avoid sending these requests and improve website performance.
To disable the Google Fonts connection, open your WordPress admin dashboard, navigate to Thrive Dashboard >> Thrive Dashboard, then Project Lightspeed, and click the Speed Settings button.
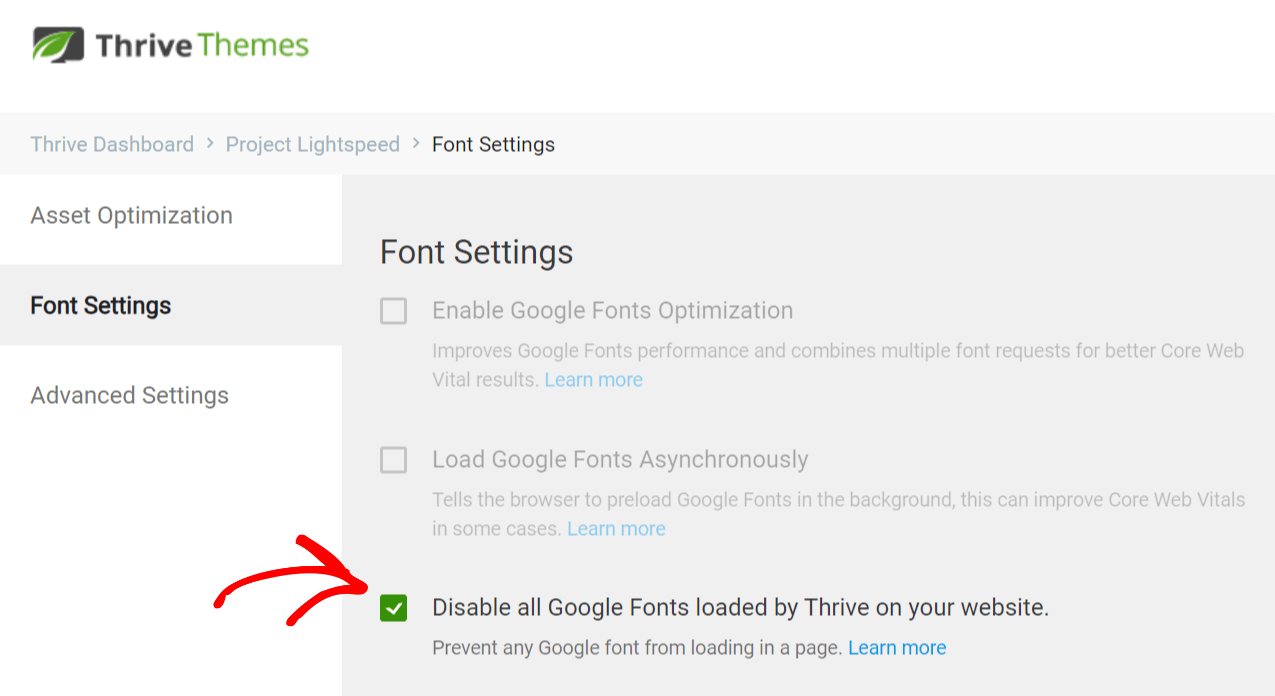
In the Project Lightspeed dashboard, click Font Settings and then check the checkbox beside “Disable all Google Fonts loaded by Thrive on your website.”
You can continue using Google Fonts without maintaining the contact by uploading Google Fonts on your server and disabling the relationship with Google servers.
Next, do you want your hyperlinks to look great too? Read this document on how to use Hyperlink text effects in Thrive Architect.