The “Checkout Form”, from the Registration page, can be translated differently than the rest of the labels and texts in Thrive Apprentice.
Here are the steps you need to follow in order to translate the “Checkout Form”:
1. Access the “Checkout Form” and its options:
Firstly, edit the Registration page that you have created/added, when you set up the SendOwl Checkout Settings. There are two ways in which you can do this:
-
Go to the “Checkout Settings” from the “SendOwl” section of your Thrive Apprentice navigation bar:
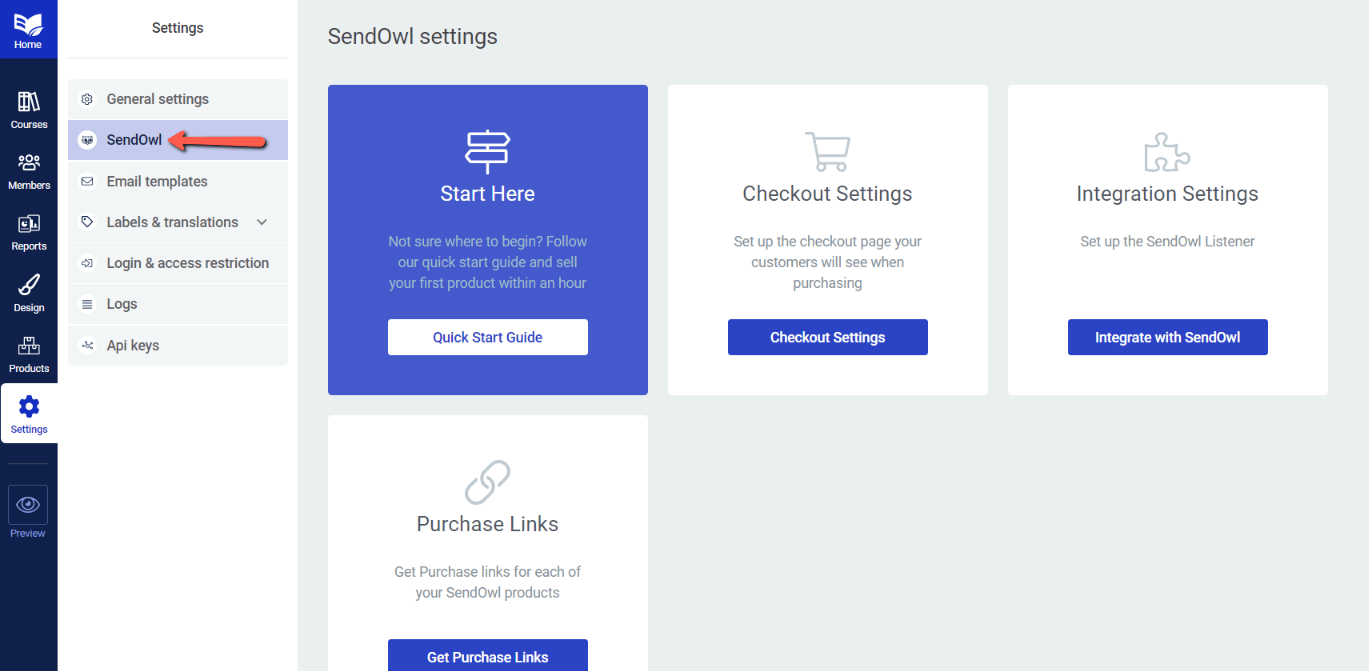
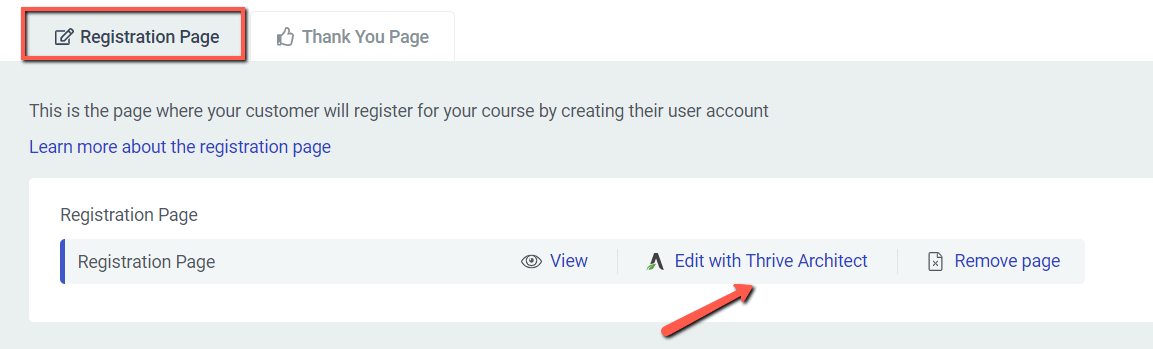
In the “Registration Page” tab, click on “Edit with Thrive Architect” next to the already existing “Registration Page”:
-
Or (if you have Thrive Architect installed) go to the “Pages” section of your WordPress admin dashboard, look for the “Registration Page” and edit it with Thrive Architect:

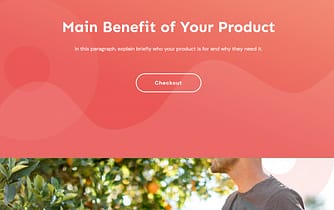
Then, click on the “Checkout” element from the page in order to access it and its options:
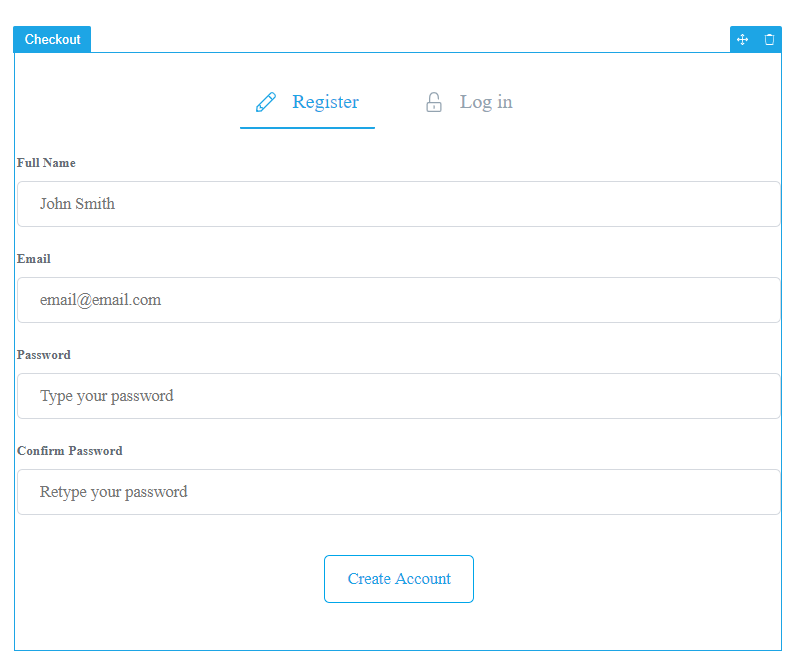
Furthermore, you will see the “Checkout Options” appear in the left sidebar (along with the other sidebar options).
If you want to change the template, you can do so from the first available field in the left sidebar:
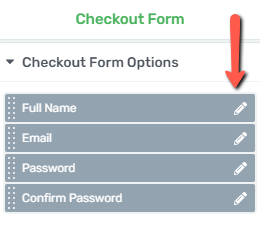
Click on the “Edit Form Elements” button to access the “Checkout Form Options”:
2. Translate the labels & placeholders
After the “Checkout Form Options” are displayed, you will see every field that the form contains. Click on the edit option (pencil icon) of the field you want to translate. In the example below, we use the “Name field”:
A pop-up window will open containing the “Label” and the “Placeholder” of the respective field. All you have to do is simply delete these and replace them with the translation of your choice. When you are done, click on the “Apply” button:

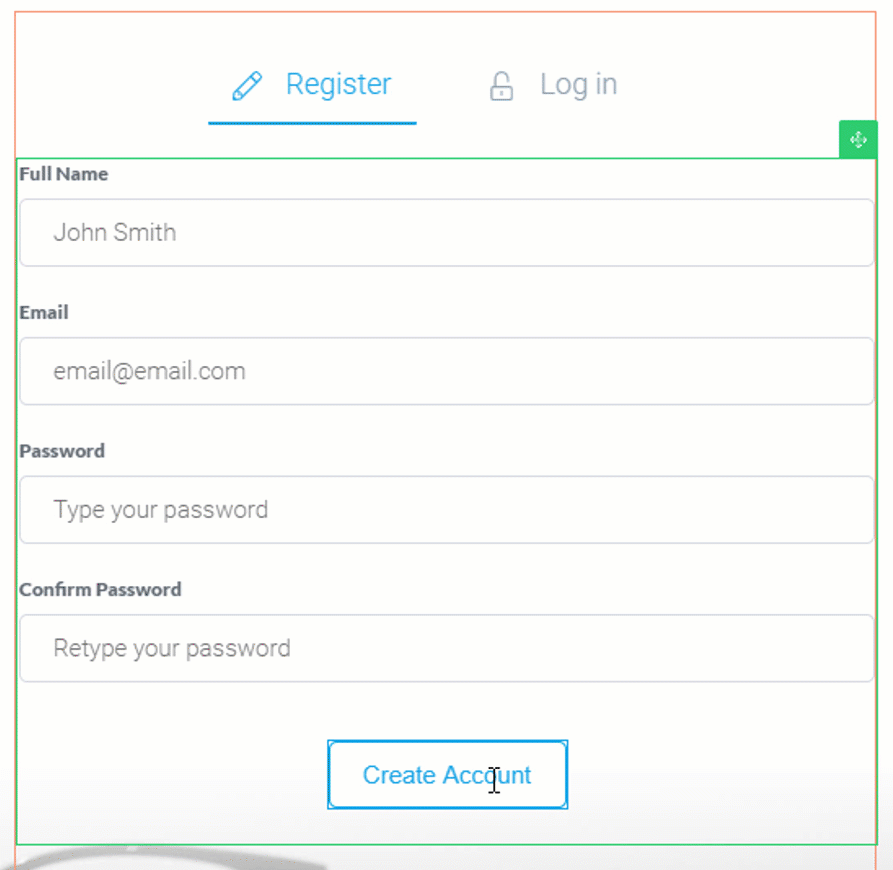
You will see that the translated texts will be displayed on the form immediately. Proceed with the rest of the fields (Email, Password, Confirm Password) in the exact same way to translate them.
3. Translate the form titles and button
After you have translated the fields of the form, it is simple to translate the “Register” and “Log in” titles as well.
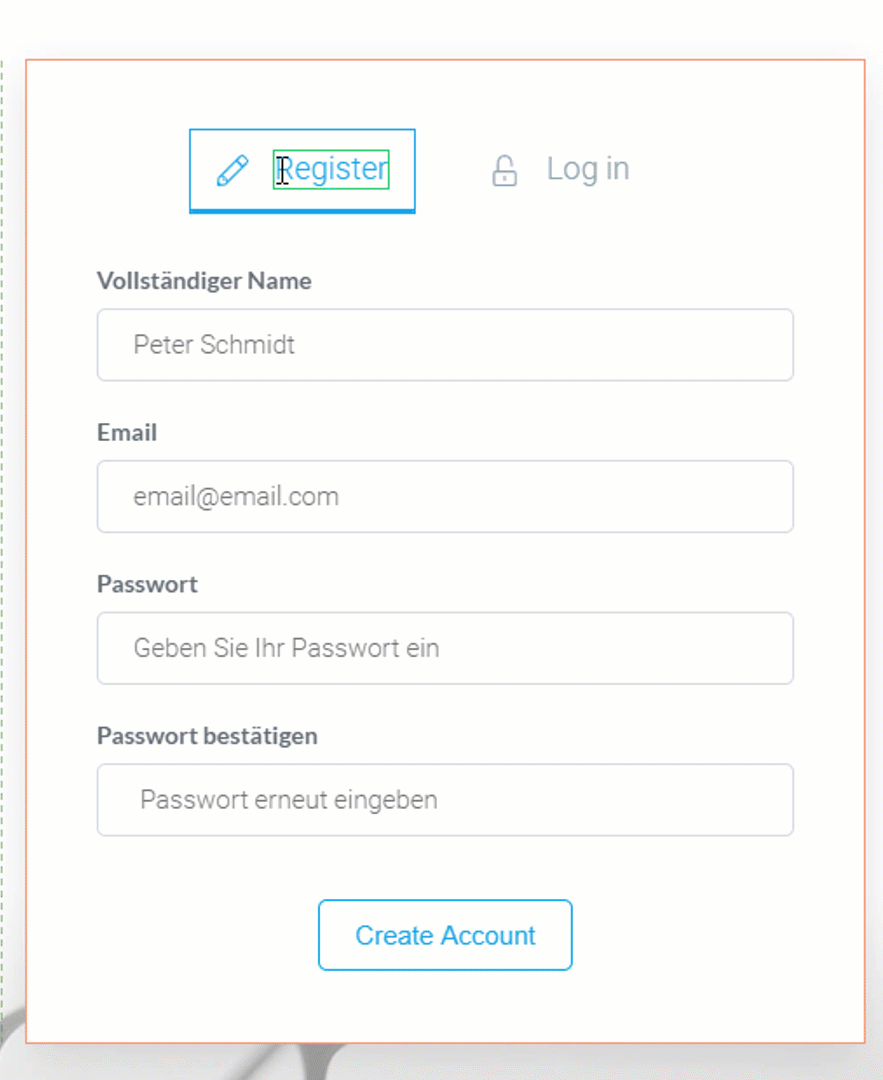
While still in editing mode of the Checkout elements, click directly on the current “Register” text from the upper part of the form:
Then, simply delete it and write or paste your own translation instead, just like this:
You can translate the “Log in” text and the “Create Account” text the same way. Simply click on the respective texts, delete them and write your translations instead.
Take a look at this example, to see how this goes in the case of the “Create Account” text, from the button:
4. Translate the other forms of the Checkout Process
Besides the Checkout form, you can also translate the other forms that appear during the checkout process.
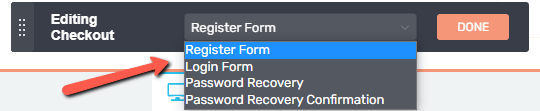
While you are still in editing mode of the Checkout elements, look for the “Editing Checkout” panel. It should be on the bottom-center part of the page.
Tip: You can also move the “Editing Checkout” panel to another part of the page, by clicking on its right dotted side and dragging & dropping it to the desired position.
When you found the panel, click on the little down arrow that is in the form section:

This will open the drop-down containing the other forms as well. Click on the one you want to translate next:
After you click on another form, you will see it displayed on the page, and you will also see its fields in the “Checkout Form Options”, in the left sidebar.
In order to translate these forms too, simply follow the same steps you took to translate the Checkout form:
-
Edit the fields from the “Checkout Form Options”: replace the current labels and placeholders with the translations you wish.
-
Then, click directly on the remaining untranslated texts (either on buttons or standalone texts), delete them and write the translations in their place.
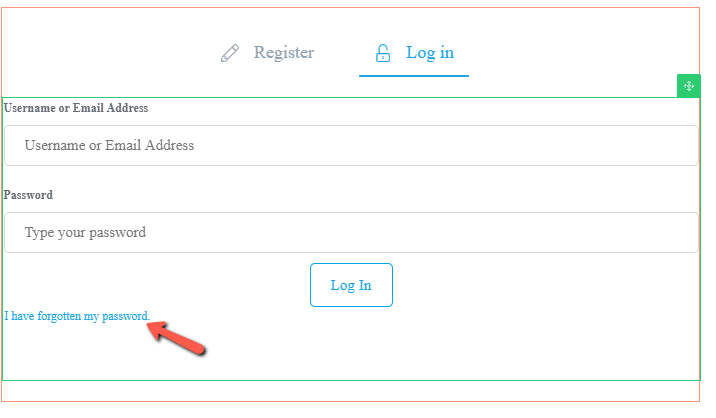
Note: While translating the “Login Form”, you will see that you can also translate the “I have forgotten my password” text, which can be found under the form:
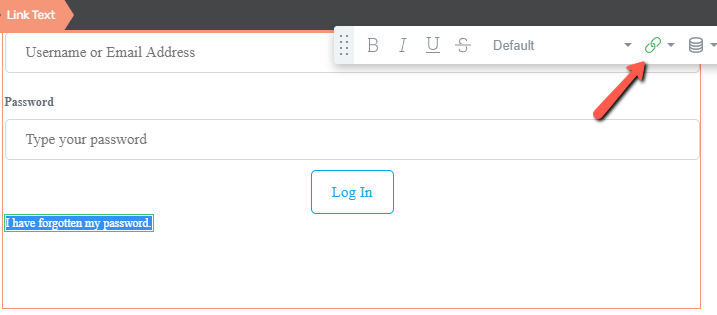
This text needs another method of translating because it is hyperlinked. In order to translate this text, click on it, and this time, do not delete it directly. Go to the “Panel Options” (on the upper center part of the page) and click on the little down arrow from the linking option to open it:
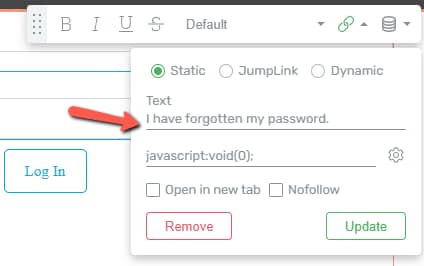
When the pop-up window with the linking details opened, look for the text in the window and change it there. Replace it with your translation, but make sure to keep the section with the link (the section above the text) the same as it was. This way you can translate the text, while the hyperlink will also remain intact:
When you want to translate another form, just open the drop-down from the “Editing Checkout” panel again, and select the next form you want to translate.
Once you have translated all 4 forms, exit the editing mode of the Checkout elements, by clicking on the “Done” button from the “Editing Checkout” panel:

5. Translate the error messages
There is one more thing left to do, in order to make sure everything related to the checkout form, and the checkout process is translated. You have to translate the error messages that might appear if a user does not complete a field or does not complete it correctly.
In order to do that, go to the “Advanced” part of the “Checkout Options” and click on the little arrow next to it, to open its drop-down:
Then click on the “Edit error messages” button:
A window will open with the error messages that can appear during the checkout process:
Simply replace the messages: delete them and then, write/paste in the translated ones that you would like displayed, like this:
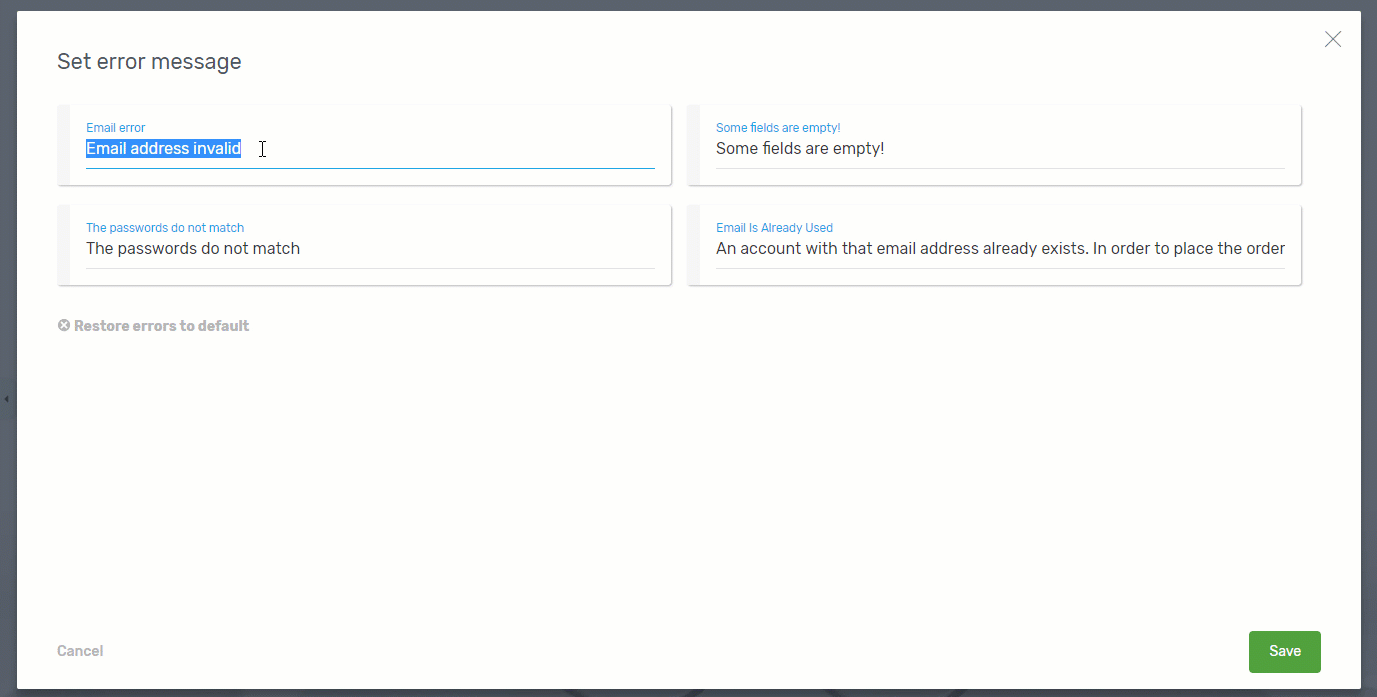
When you are done click on the “Save” button to save the translations for the error messages.
Save & Preview
Lastly, save the changes you have made by using the “Save work” button, from the bottom left side of the page; and preview them with the “Preview” button from the bottom-middle part of the page.
This way you will see how the translations are displayed for the visitors of your website as well. This is how the example checkout form we translated looks like:
If you want to find out more about the checkout and purchasing process, please take a look at this tutorial.
Hopefully, this article was useful to you. If so, please give us a smile below 🙂