The “Global Fields” feature allows you to quickly insert global information (such as your company’s name, address, phone number, etc.) to the pages of your website, without having to type the same content over and over again.
Here are the key aspects you need to know about this feature in order to use it:
Where to find the Global Fields feature
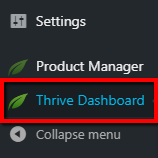
First of all, you will need to access the “Smart Settings” of your Thrive Dashboard, in order to see and use the “Global Fields” feature. To do this, go to your WordPress admin dashboard and click on the “Thrive Dashboard” from the menu on the left side:
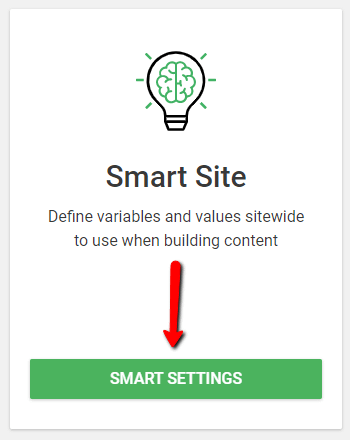
Then, scroll down until you see the “Smart Site” card and click on the “Smart Settings” button from it:
How to use the Global Fields
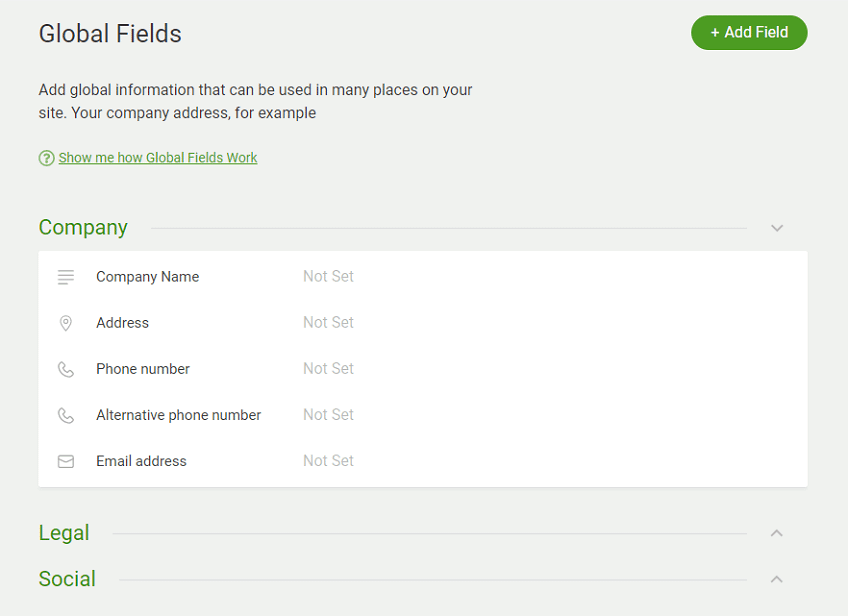
Once you have accessed the “Smart Settings”, the page containing the “Global Fields” feature, represented by every “Global Field”, will open. You will see that the fields are categorized into groups. This is how the “Company” group looks when it is opened (when you access the “Global Fields” page, this will be opened by default):
Default Global Fields and Groups
There are default groups, as well as default fields, added to the “Global Fields” feature. The default groups and fields are as follows:
- The “Company” group: containing the “Company Name”, the “Address”, the “Phone Number”, the “Alternative Phone Number” and the “Email Address” fields.
- The “Legal” group: containing the “Privacy policy”, the “Disclaimer”, the “Terms and Conditions” and the “Contact” fields.
- The “Social” group: containing the “Facebook Page”, the “YouTube”, the “LinkedIn”, the “Pinterest”, and the “Instagram” fields.
If you want to open one of these groups, all you have to do is to click on their name or the arrow next to their name:

Set the values of the default fields
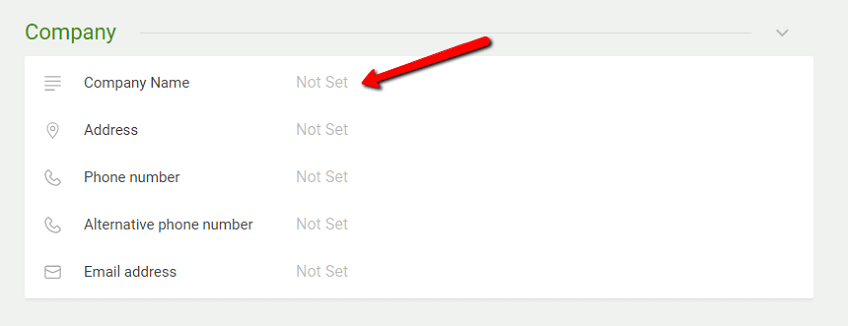
At first, you will see the “Not Set” status next to the fields in the default groups:
You will have to set the values for these fields, meaning enter the relevant information for the fields. In order to do that, hover your mouse over the field you want to complete/set a value for and click on the “Edit” option (pencil icon) that appears next to the “Not Set” status:

This will open the edit window, where you can enter the relevant information/the value for this “Global Field”. All you have to do is to enter (type in or paste in) the info in the “Text” section and then, click on the “Save” button:
The information or value you have to enter for each field is according to the name of the particular field. So, for example, if you are completing the “Company Name” field, then, you should enter the name of your company here.
You should set every default “Global Field” this way, in order to be able to use them later on.
Note: Since you are editing a default field, you will not be able to change the group this field belongs to or the type of the field.
Add new Global Fields and Groups
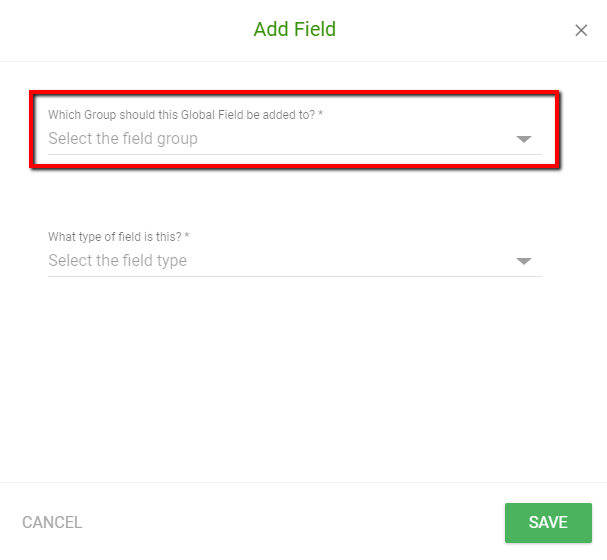
If you want to add new fields to the already existing groups or in case you want to add a new, Custom group with new fields; then, click on the “Add Field” option from the upper right part of the “Global Fields” page:

In the window that opened, you will be able to add new groups, as well as new fields. First, click on the “Select the field group” section to open its drop-down:
- If you wish to add new fields to one of your already existing groups, then, simply select the group from the drop-down:
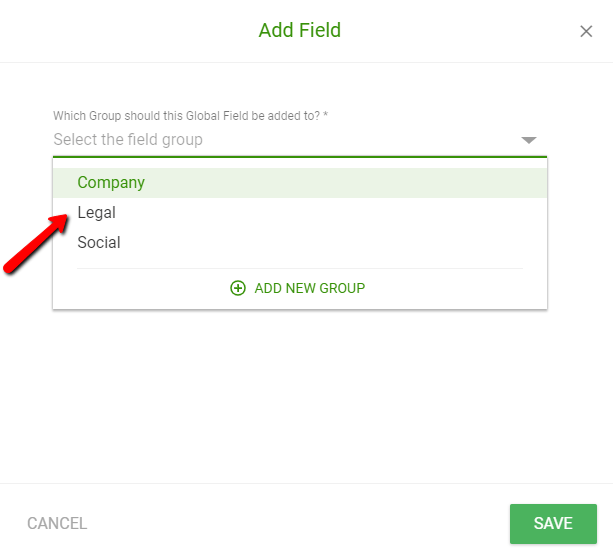
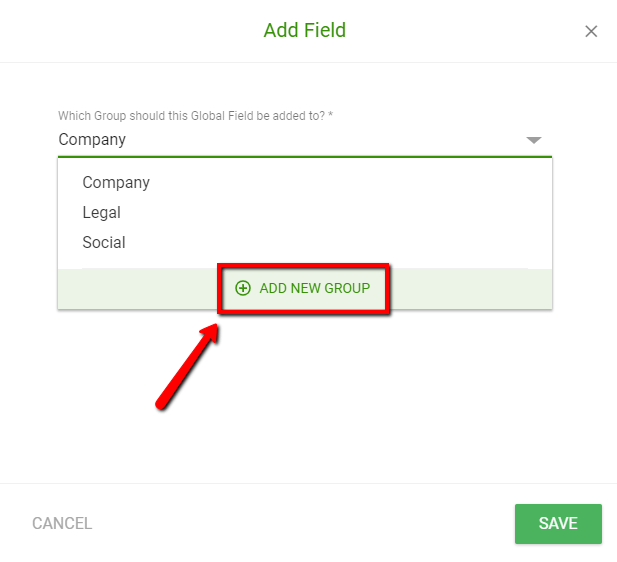
- If you want to create a new group, then, click on the “Add New Group” option from the drop-down:
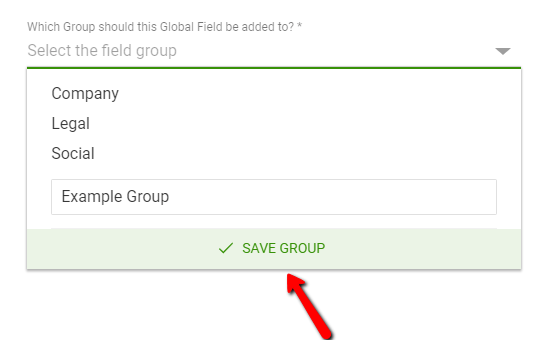
Enter the name of the new group you want to create in the “Complete the group name” section that appeared:
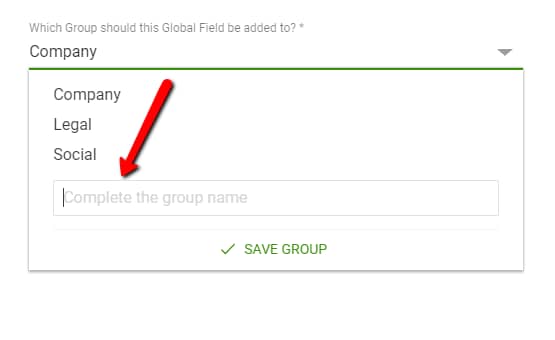
When you have completed the name, click on the “Save Group” option to add the group to your list:
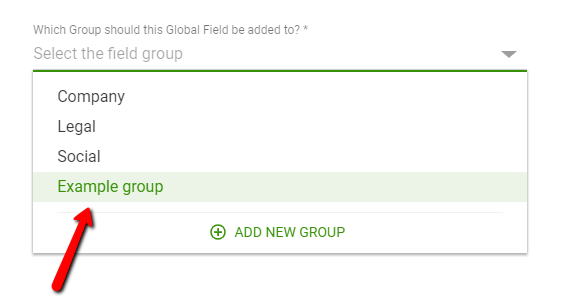
Next, open the “Select the field group” section again and now choose the newly created group from the drop-down to continue:
The next step in both cases is to choose the type of field you want to add to the group. For that, click on the “Select the field type” section to open its drop-down:
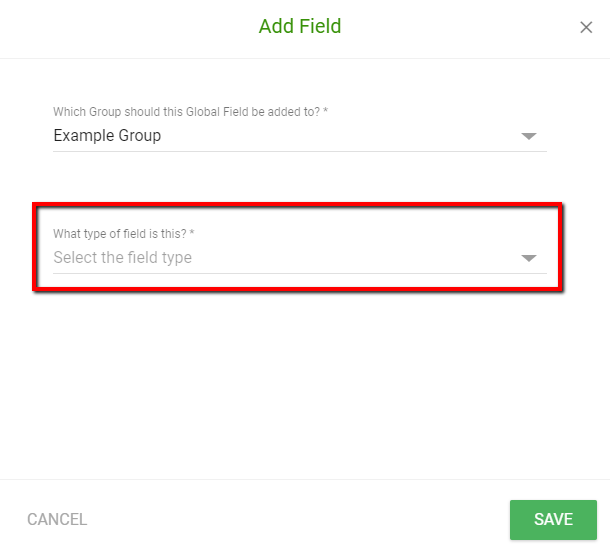
After the drop-down with the available field types is opened, click on the field type you want to add to the group:

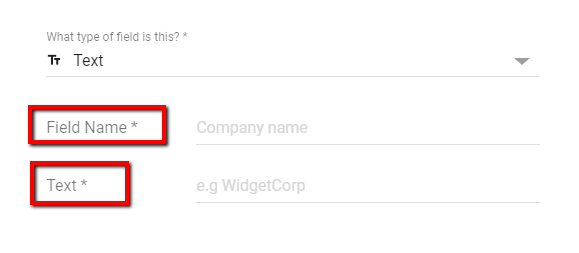
Depending on what field type you have chosen, there will be different sections you have to complete. For instance, if you want to add a “Text” field, then you will have to complete the “Field Name” and the actual “Text” you want in the field:
Complete the sections that appear based on the field type you have chosen and once you are done, click on the “Save” button, from the bottom right corner of the window, to add the field to the group.
Edit Group Name (Custom Groups)
Note: Please keep in mind that you cannot edit the names of the default groups, since those come by default and cannot be changed.
You can edit the names of the groups that you yourself have added. These will be displayed in the “Custom Groups” section. In order to delete the name of a Custom Group, you will have to use the “Edit” option of the respective group.
Hover your mouse over the name of the group you want to edit and click on the “Edit” option (pencil icon) that appeared next to it:

After you click on the edit option, a pop-up window will open, where you can edit the name of the group. Delete the current name from the “Group name” section and replace it with the new name you want to give to the group:

When you are done, click on the “Save” button from the bottom right corner of the pop-up and the group will be re-named.
Edit Field
In order to edit one of the fields from a group, you will have to hover your mouse over the respective field and click on the “Edit” option (pencil icon) that appears next to it:

Note: In case you have not set a field yet, you will see the “Not Set” status next to the name of the field. Naturally, you can also set the field using the edit option.
There are five field types and depending on what kind of field you are editing, there will be various options in the pop-up window that opens. Here are the examples of how editing each of these types will look like:
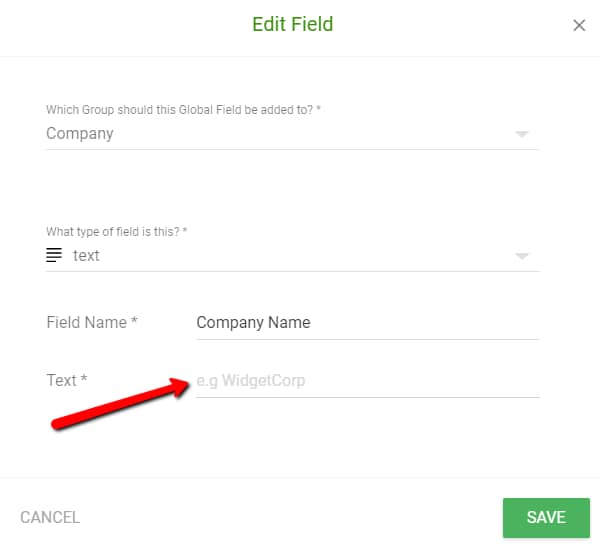
Text field
When you edit a text field, you will have two sections available: the “Field Name” and the “Text” sections. In order to change the content of these fields, you just have to delete the current content and type in (or paste in) the new info you want to add to the fields:
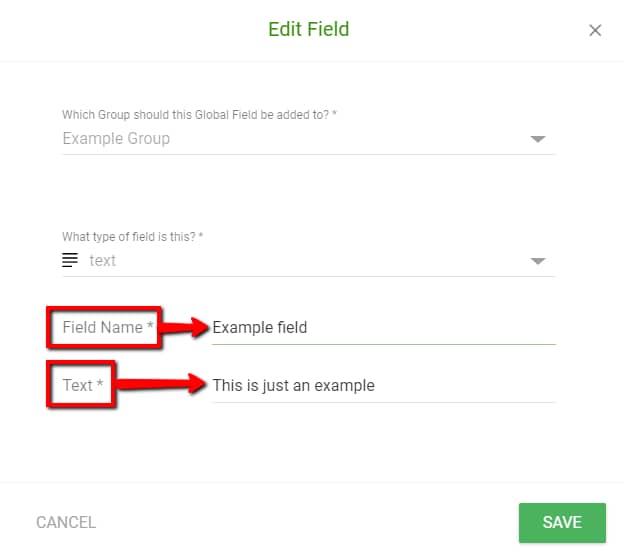
Once done, click on the “Save” button to save the changes you have made.
Note: Whenever you are editing a default field, please keep in mind that the “Field Name” section will not be editable since that comes by default. Nevertheless, you can edit the “Text” field anytime.
The same principles of editing can be applied to the other field types as well.
Address field
In the case of the “Address” field, you will have more sections you can edit: the “Field Name”, the “Address line 1”, the “Address line 2”, the “City”, the “Country / State”, the “Zip / Postal Code”, and the “Country” sections:
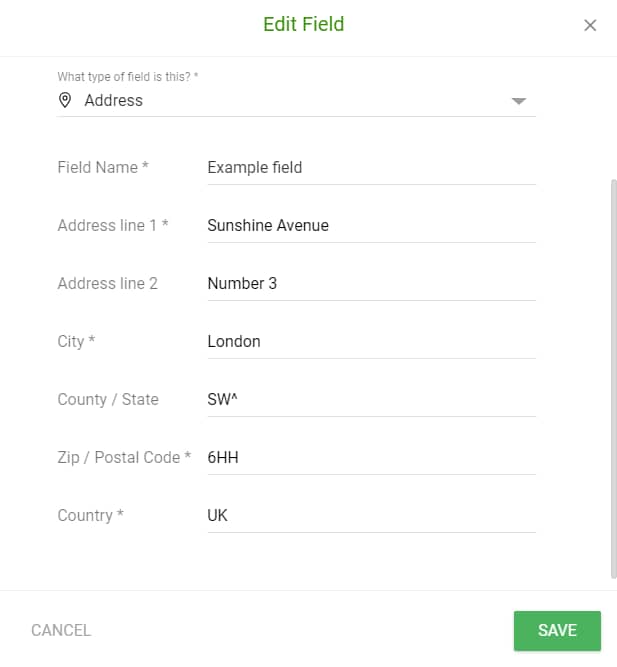
As the name of the sections suggests, you should complete/edit these fields with suitable information about your company’s location.
Editing these sections works the same way as in the case of the “Text” field. If you haven’t completed them yet, you can do it now, by adding relevant info to the various sections.
However, if you have already completed these sections and you want to change the info from them, then, simply delete the current information and replace it with the one you want.
Phone field
This field will contain two sections that you can edit: the “Field Name” and the “Phone Number” sections:
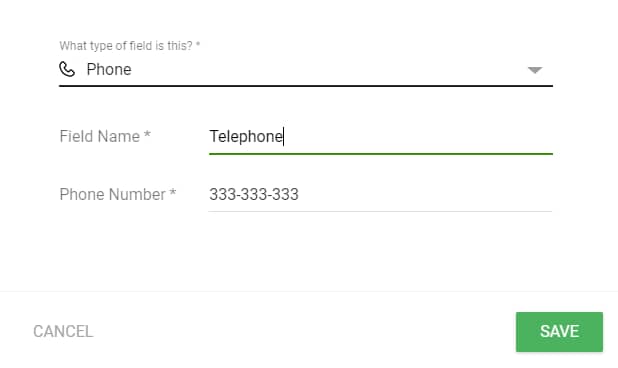
Just as before, delete the current information, replace it with the new one you want to add and then, click on “Save” to save the changes.
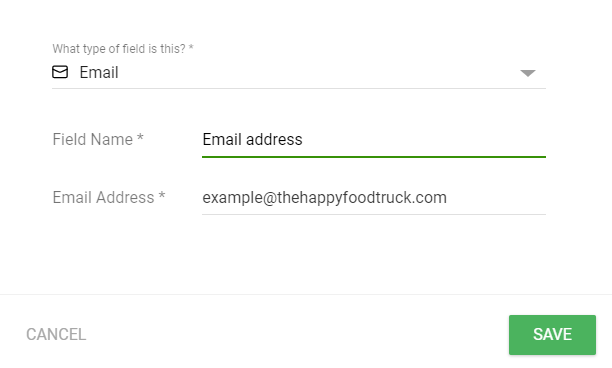
Email field
When editing an email field, you can modify the “Field Name” and the “Email Address” sections. Once you’ve done the necessary changes, you can click on the “Save” button to apply them:
Link field
The link field has 3 editable sections: the “Field Name”, the “Link Text” and the “Link URL”:
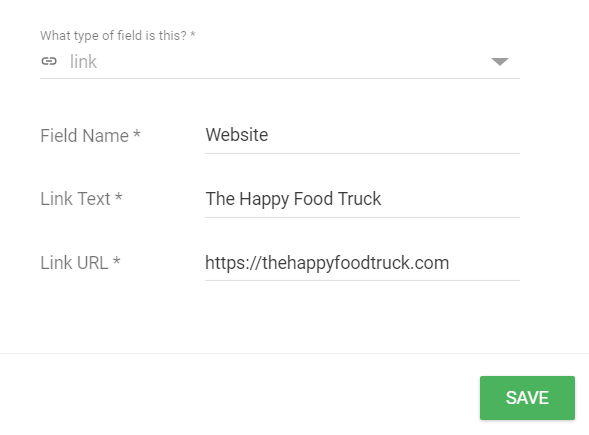
After you have edited them, click on the “Save” button for the changes to be visible in the “Global Fields” feature too.
Delete Custom Group or a Field
If you want to delete a Custom group or a field that you have created, in the “Global Fields” page, you will have to use the “Remove” option.
-
In order to delete a group, hover your mouse over the group’s name and click on the “Remove” option (trash icon) that appears on its right, next to the “Edit” option:

After you click on the “Remove” option, a warning message will appear in a pop-up window, letting you know that if you delete the group, any field that is in it will also be deleted.
You will have to confirm that you indeed want to delete the group by clicking on “Yes”. Then, the group will be deleted.
- In order to delete a field that you have created, hover your mouse over the respective field and click on the “Remove” option (trash icon) that appears:

Again, a pop-up window will open with a warning message, letting you know that if you delete the field, the information it contains will be deleted from every part of the website it is displayed on.
You will have to confirm that deleting the field is indeed what you want to do. After you do this, the field will be removed from the “Global Fields”.
Note: Please keep in mind, that neither the default “Fields” nor the default “Groups” can be deleted. This is why the delete option is not available for these.
How to Insert Global Fields to your page
After you have finished setting up your “Global Fields” you will have the possibility to use these fields on any of your pages while editing them with Thrive Architect.
You will be able to add the values/information you have entered for these fields to a “Text” element in the form of shortcodes.
Access page
First, edit the page you want to display the “Global fields” on with Thrive Architect. Then, add a “Text” element to it.
When you enter the actual text and you reach a part where you want to insert a value/info from a “Global Field”, click on the “Dynamic Texts” option from the Panel options that are displayed for the “Text” element:

This will open a drop-down where you can choose from the available “Global Fields”, according to what you need in the particular sentence.
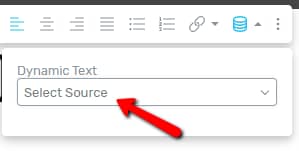
Choose the source
Since the “Dynamic Texts” option is a more complex one, you can add more dynamic information besides the “Global Fields” one. Therefore, click on the “Select Source” field:
This will open a sub-menu with some “Dynamic Text” sources. Click on “Global Fields”:
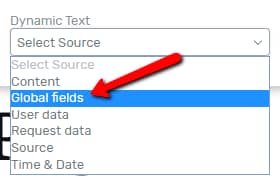
Then, another field will appear, where you can choose the actual “Global Field” to be inserted.
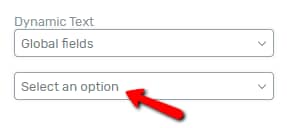
Choose field
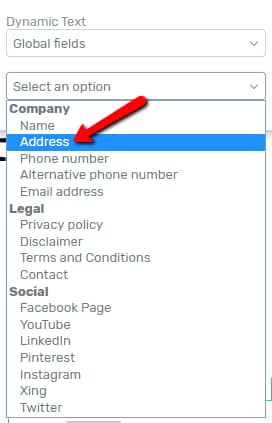
Click on the “Select an option” section to open it and select the field you want to add to your text:
For instance, if the sentence you want to use this field in is something like: “Our company is located at … “ then, you will have to insert the “Address” field you have set in the “Global Fields”:
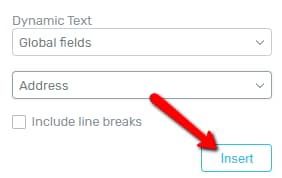
After you have selected both the “Global Fields” option and the field, all you have left to do is to click on the “Insert” button and the values/info you have previously set to the field will be added to your text:
This way you can insert any of the “Global Fields” to the text on your pages whenever you want, thus, saving time and effort.
Hopefully, this article was useful for you. If so, please give it a smile below 🙂